
Wiki
Guides, systems and world reference for OTUniverse.
Contents
Vocations & Combat
The Five Vocations
Sorcerer (Master Sorcerer) — the highest burst spell damage; a fire & energy nuker.
Druid (Elder Druid) — an ice & earth mage with the strongest healing and support.
Paladin (Royal Paladin) — a ranged distance fighter with a holy hybrid kit.
Knight (Elite Knight) — a melee tank with the best mitigation and HP pool.
Monk (Exalted Monk) — the new unarmed fist-fighter (see below).
Every vocation shares the same custom systems: Signature and Level 900 ultimate spells, an Avatar transform, Evolutions, Mastery Paths (Ctrl+U), gear Refinement and the Forge.
The Monk
Harmony — a 0–5 resource that builds up as you cast attack spells and is spent by “spender” spells for bonus effects (for example Spiritual Outburst chains extra targets at full Harmony). Focus Harmony instantly fills it to 5.
Virtue stances — cast a Virtue spell (Harmony, Justice or Sustain) to set a passive combat stance.
Element Attunement — use (click) your equipped fist weapon to cycle the element your offensive spells deal: Physical → Earth → Energy → back to Physical. Your choice persists across logout.
Avatar of Balance — at level 400 the Monk unlocks its Avatar transform, a 15-second morph with 100% critical hit chance, +20% critical damage and +10% all-element resistance (10-minute cooldown).
Monk spells include Swift & Double Jab, Flurry of Blows, Tiger Clash, Forceful Uppercut, Sweeping Takedown, Mystic Repulse, Chained Penance (jumps between up to 9 nearby monsters) and Hundred Fists (the Monk signature). Like every other combat skill, Fist Fighting can be lost on death.
Signature & Ultimate Spells
Signature spell (level 200) — a rapid single-target multi-shot burst that lands its whole barrage on your locked target (no splash): Sorcerer Cataclysm Volley, Druid Glacial Cascade, Paladin Divine Volley, Knight Berserker Onslaught, Monk Hundred Fists.
Ultimate spell (level 900) — each vocation's strongest sustained-DPS AoE nuke, unlocked once you have earned the ultimate-spell unlock reward: Sorcerer Cinder Cataclysm, Druid Glacial Apocalypse, Paladin Solar Lance, Knight Crimson Reaper, Monk Cataclysmic Palm.
Avatar transform (level 400) — a 15-second morph into your vocation's Avatar (Storm / Nature / Light / Steel / Balance) granting 100% critical hit chance, +20% critical damage and +10% resistance to every element, on a 10-minute cooldown. Unlocked by default at level 400 — no quest needed.
Avatar Form (tier proc)
Mana Buffer & PvP Rules
PvP damage is reduced to 50% of PvE damage so fights stay survivable against big Evolution HP pools, and life & mana leech are halved in PvP. Healing is never reduced.
Ultimate Spells (Level 900)
Core Systems
Currency & Coin Conversion
Clicking a stack of 100 or more upgrades every whole 100-chunk to the next coin up: 500 platinum becomes 5 crystal coins, and 250 platinum becomes 2 crystal coins with 50 platinum left behind. Clicking a stack under 100 makes change instead — it removes 1 of that coin and hands you 100 of the denomination below, so a single gold bar splits into 100 crystal coins and a single platinum splits into 100 gold. This lets you break big coins down whenever a shop or trade needs exact change.
Tokens & Exchange System
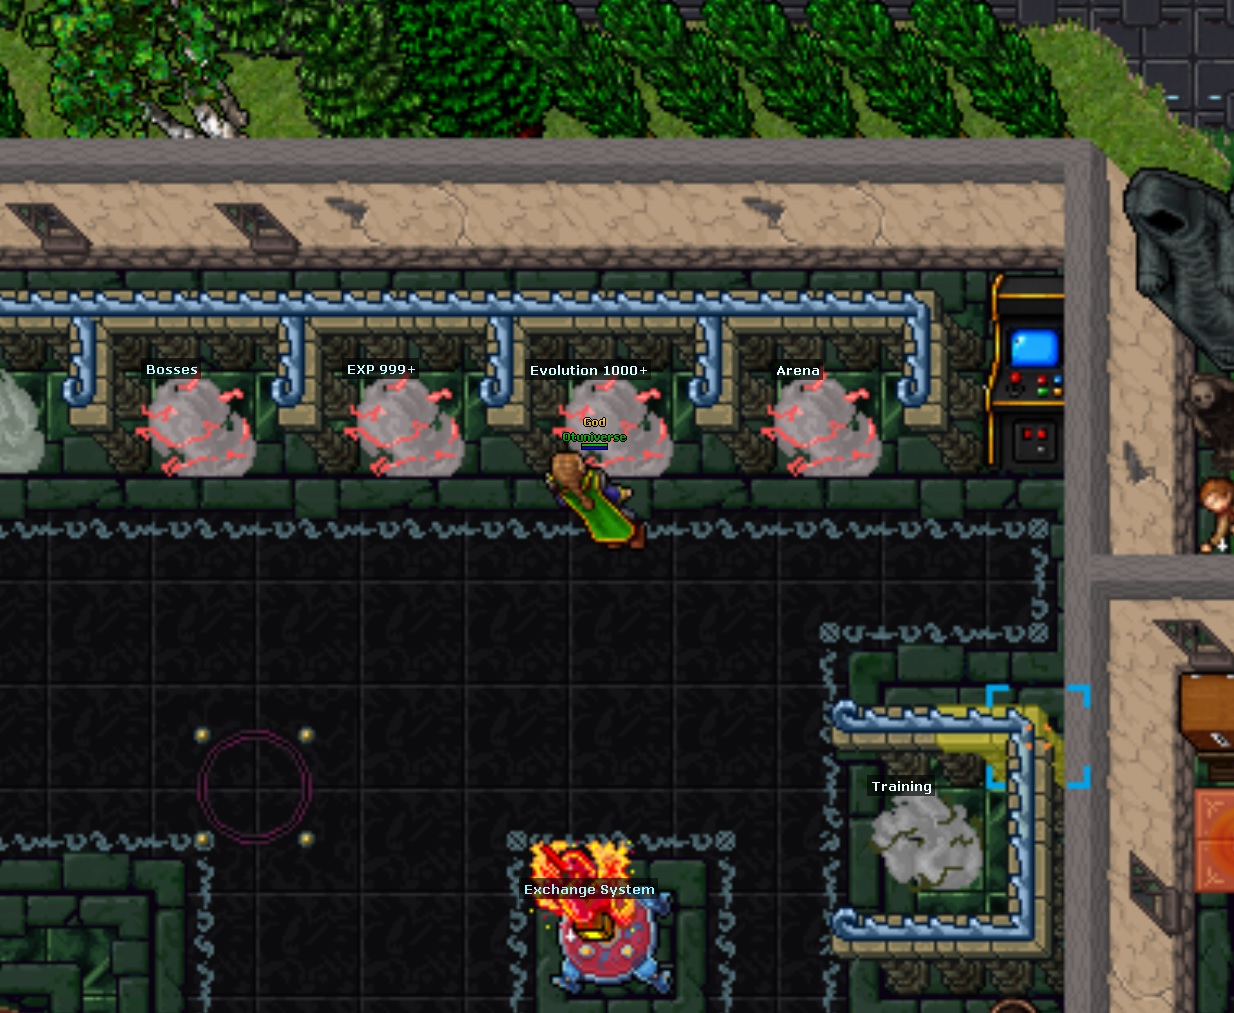
Everything token-related lives in one window — the Exchange System in the Main Hall (Ground Floor). It has six currency tabs; open the tab matching the tokens you own to buy rewards, and on the four token tabs you can also trade matching gear back for more of that token. (The Gold Coins and OtUniverse tabs are buy-only.)
- ⏳ 1 Token per 2 hours of online time (per IP / per player).
- 💀 Any boss kill grants +1 Boss Point; 5 Boss Points convert into 1 Otuniverse Token.
| Tab | Currency | What it offers |
|---|---|---|
| 🔷 Crystaline | Minor Crystaline Token | Medium-grade gear (Lion / Cobra / Falcon sets for every vocation, including Monk fist weapons) for 2–6 tokens, plus a Tier Upgrade Crystal (10) and coin bundles. Earn tokens by dropping any Classification-4 item here (1 token each). |
| 💜 Soul | Soul Token | The full Soul set (including Monk soulkamas / soulgarb / soulsoles) at 5 tokens each. Trade any of those items back for 1 Soul Token. |
| 💚 Primal | Primal Token | The Primal set (including the Monk charged ethereal ring & coned hat) at 5 tokens each. Trade back for 1 Primal Token. |
| ❤️ Sanguine | Sanguine Token | The Sanguine set (including Monk sanguine claws & trousers) at 5 tokens each. Trade back for 1 Sanguine Token. |
| 🪙 Gold Coins | Gold | Daily gold-bought boosts: XP Boost 60 min / 30 min and 20 / 10 Prey Wildcards (priced in the tens of millions of gold) — each capped at 2 per day. XP-boost and prey-card buys draw on the account-wide daily budget of 3 hours of XP boost and 60 prey cards shared across every source (items, gold tab, token tab). |
| 🎟️ OtUniverse | Otuniverse Token | The main token catalogue (full list below). Locked until you complete all of the Pirate Trader's missions — the rewards stay greyed-out until then. |
| Reward | Cost |
|---|---|
| ⚡ XP Boost — 60 min (50%) | 12 tokens |
| 📜 20 Prey Wildcards | 12 tokens |
| 🪙 Gold Token ×3 | 3 tokens |
| 🎰 Roulette Coin | 8 tokens |
| 🏅 VIP Medal (3 days) | 100 tokens |
| 💎 Tier Upgrade Crystal | 40 tokens |
| 🦁 Lion of War outfit deed | 150 tokens |
| 🏹 Veteran Paladin outfit deed | 150 tokens |
| ✨ Void Master outfit deed | 150 tokens |
| 🐉 Dragon Slayer outfit deed | 250 tokens |
Note: the OtUniverse catalogue unlocks only after you finish all of the Pirate Trader's missions; once done, the Pirate Trader NPC sells the same items too.
| Outfit | Bonuses |
|---|---|
| 🦁 Lion of War | +5% Melee Damage · +350 Max HP · +350 Max MP · +5% Physical · +5% Earth · +5% Energy |
| 🏹 Veteran Paladin | +5 Distance Skill · +250 Max HP · +350 Max MP · +5% Holy · +5% Physical |
| ✨ Void Master | +450 Max HP · +5% Fire · +5% Ice · +5 Magic Level |
| 🐉 Dragon Slayer | +600 Max HP · +8% Fire Resistance · +4% Physical Damage |
Companion Pets
There are five, each with a role:
Mender — heals your HP and restores mana.
Guardian — reduces incoming damage.
Hunter — more damage and critical hit chance.
Sage — more experience, prey and loot value.
Mystic — lower spell cooldowns and mana cost.
Getting a companion: each one is earned from a different source — Mender from completing the beginner quests, Hunter from the Pet Detective quest, Sage from the Shadow Lord quest chain, Mystic from The Arcane Keeper quest chain, and Guardian from a Playtime Present.
Open the Companions panel with Ctrl+J to summon, dismiss and switch between the companions you own. Each companion evolves automatically as you gain Evolutions, changing its look and growing about 3× stronger across 7 forms. Companions also earn their own XP and level up, letting you spend points in a per-pet skill tree on the panel's Skill Tree tab. You can also feed them foods they like for a temporary XP boost, and play with them using !trick (type !trick list to see the tricks). See the full roster, looktypes and roles on the Pets page (also in the Community menu).
Prey, Charm and Imbuement Systems
Prey Bonuses Available:
- Damage Boost: Deal up to +15% extra damage to your selected prey — 1.5% per prey star, climbing from ~1.5% at 1 star to 15% at 10 stars.
- Damage Reduction: Receive 12% to 30% less damage from your prey (in steps of 2%).
- Bonus Experience: Gain +13% to +40% extra experience for defeating your prey (in steps of 3%).
- Improved Loot: Find +13% to +40% more loot from your prey (in steps of 3%).
You can reroll and select the monster and bonus you want using Prey Cards!
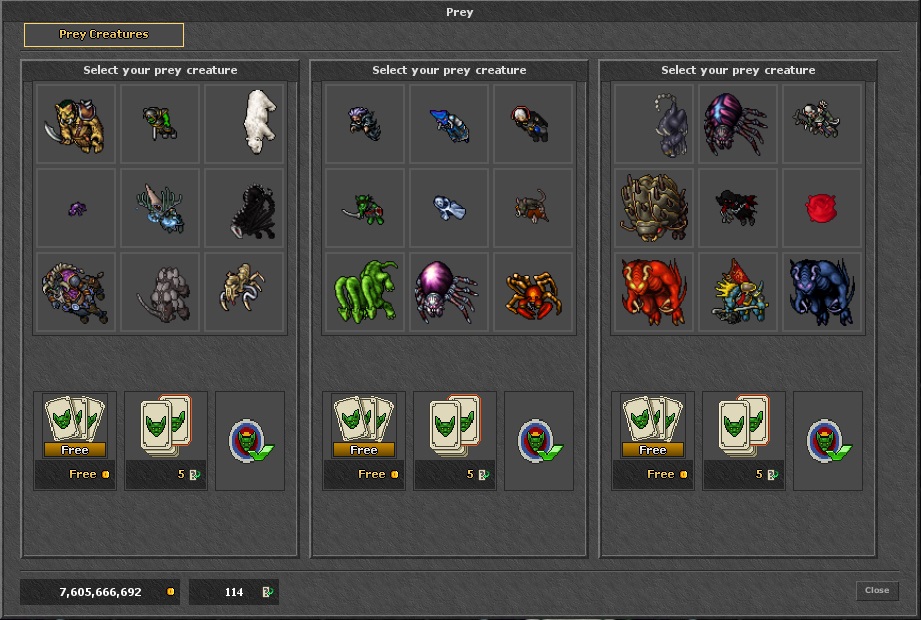
Charms are powerful upgrades you can equip against specific creatures.
Each charm provides a unique effect and can be unlocked with Bestiary Charm Points.
- Wound: 30% chance to deal 40% extra physical damage once.
- Enflame: 30% chance to deal 40% extra fire damage.
- Poison: 30% chance to deal 40% extra earth damage.
- Freeze: 30% chance to deal 40% extra ice damage.
- Zap: 30% chance to deal 40% extra energy damage.
- Curse: 30% chance to deal 40% extra death damage.
- Cripple: 10% chance to paralyze the monster for 10 seconds.
- Divine Wrath: 30% chance to deal 40% extra holy damage.
- Parry: 10% chance to reflect incoming damage to the attacker.
- Dodge: 12% chance to dodge and take no damage at all.
- Adrenaline Burst: 10% chance to gain movement speed for 10 seconds after being hit.
- Numb: 10% chance to paralyze the monster after its attack for 10 seconds.
- Cleanse: 10% chance to remove a negative status effect after being hit (and makes you temporarily immune).
- Bless: Reduces skill and XP loss by 10% when killed by the chosen creature.
- Scavenge: Increases chance to skin or dust creatures by 30%.
- Gut: Gutting a creature yields 20% more products.
- Low Blow: Adds 8% critical hit chance with crit weapons.
- Vampiric Embrace: Adds 4% Life Leech if your equipment provides life leech.
- Void's Call: Adds 2% Mana Leech if your equipment provides mana leech.
Some effects trigger only occasionally, while others are always active!
Changed your mind? You can reset all your charms from the Cyclopedia Charms tab — every spent charm point is refunded (for a gold fee of 1,000 gold per point) so you can re-pick freely.

Imbuements are bonuses fused into a weapon, a piece of armour or an accessory at an Imbuing Shrine — applied to the item itself, not through a spellbook. Each imbuement lasts 20 hours of active fighting time, then fades and the slot can be re-imbued.
| Tier | Gold fee | Success | Protection fee | Materials |
|---|---|---|---|---|
| Basic | 20,000 gp | 90% | 20,000 gp | 5× Crystal Coin |
| Intricate | 125,000 gp | 70% | 125,000 gp | 4× Gold Token |
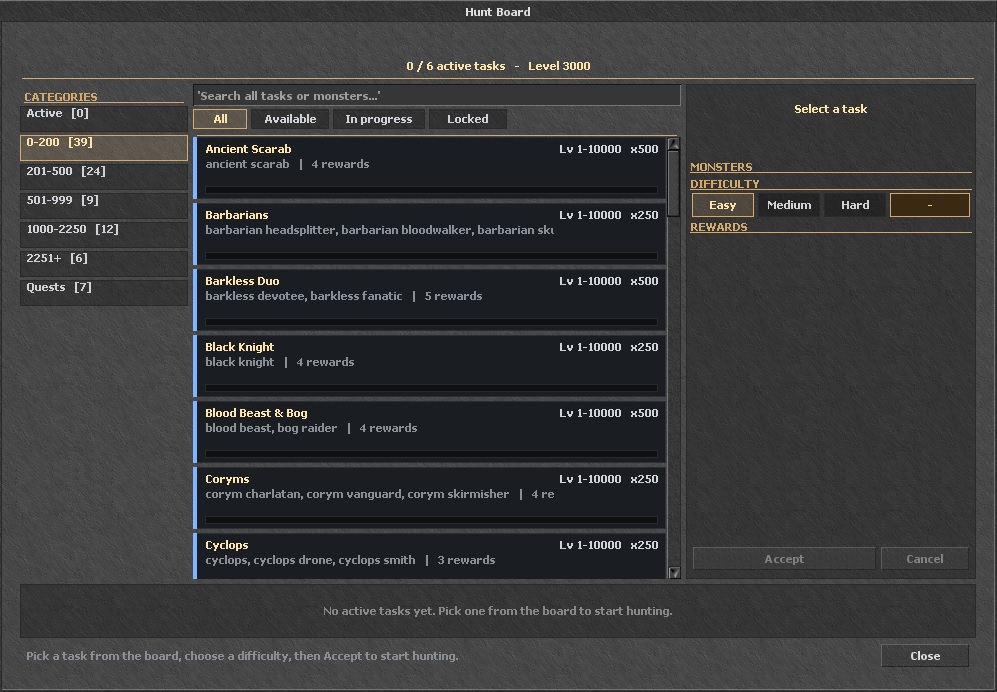
| Powerful | 375,000 gp | 50% | 375,000 gp | 6× Gold Token |
| Imbuement | Effect |
|---|---|
| Scorch / Venom / Frost / Electrify / Reap | Converts 10% · 25% · 50% of physical damage into fire / earth / ice / energy / death |
| Vampirism (life leech) | Heals 8% · 16% · 40% of the damage you deal |
| Void (mana leech) | Restores 3% · 6% · 10% of the damage you deal as mana |
| Strike (critical) | +15% · +25% · +50% critical damage, plus +10% critical chance |
| Swiftness (speed) | +10 · +15 · +30 walking speed |
| Featherweight (capacity) | +3 · +8 · +15 capacity |
| Chop / Slash / Bash / Blockade / Precision | +1 · +2 · +4 axe / sword / club / shielding / distance skill |
| Punch (Monk) | +1 · +2 · +4 fist fighting skill |
| Epiphany | +1 · +2 · +4 magic level |
| Lich Shroud | Reduces incoming death damage by 2% · 5% · 10% |
| Snake Skin / Dragon Hide / Quara Scale / Cloud Fabric / Demon Presence | Reduces incoming earth / fire / ice / energy / holy damage by 3% · 8% · 15% |
Server Bonus Basin
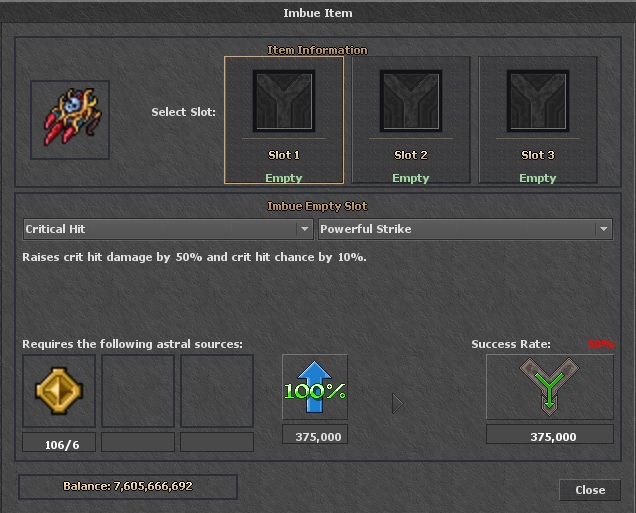
The Server Bonus Basin lets all players work together to activate a global server bonus for 1 hour. By feeding special tokens into the basin, you can trigger one of four different bonuses.
All monsters in the world can drop these special tokens as loot. Keep hunting and you will slowly collect them while you play:
- Spawn Token
Grants a temporary global respawn rate bonus when offered at the Temple Bonus Basin. - Skill Token
Grants a temporary global skill gain bonus when offered at the Temple Bonus Basin. - Loot Token
Grants a temporary global loot bonus when offered at the Temple Bonus Basin. - Experience Token
Grants a temporary global experience bonus when offered at the Temple Bonus Basin.
- The basin is located in the Temple / Main Hall, between the main teleports.
- Use the basin to open the Server Bonus Basin window.
- You will see the current progress for each token type, e.g. Exp – 0/100, Loot – 0/100, Skill – 43/100, Spawn – 0/100. The target is not fixed — it scales with how many players are online (about 50 tokens when quiet, up to 200 when busy).
- Select one line (Exp / Loot / Skill / Spawn) and use the buttons at the bottom (Add 1, Add 5, Add All) to contribute that token from your inventory.
- Once a bar reaches its current target, that token triggers a +25% global bonus (1.25× rate) for 1 hour for the selected type.
- Only one global bonus can be active at a time – you can’t feed more tokens while a bonus is running.
Small contributions send a message only to you, while large contributions (more than 10 tokens at once) are broadcast to the whole server showing your name and the new progress. When the hour is over, the rates return to normal and the basin becomes available again for the next global bonus. Each bonus type can be triggered at most 3 times per 12-hour window (windows reset at 04:00 and 16:00 server time).
Hunt Board
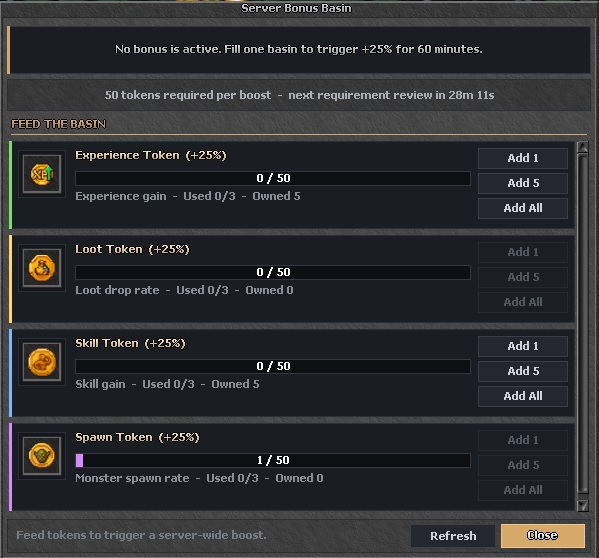
The Hunt Board is the monster-hunting task system — a single searchable window with over 110 hunting tasks. Reach a task quota and its rewards arrive automatically; there is nothing to hand in.
- Use a task board while standing in a protection zone to open the full window.
- Or quick-start a task with !task <difficulty>,<monster> in a protection zone — for example !task easy,rotworm.
- The board is server-driven: it always shows your live progress and which tasks are available or locked.
- Over 110 tasks, each a fixed monster (or group) with a required kill count.
- Hold up to 10 tasks at once; a bottom tracker shows every active task with a live progress bar.
- Tasks are grouped into level brackets (0–200, 201–500, 501–999, 1000–2250, 2251+, three Desert brackets 3600–4250 / 4500–5000 / 5500–7000, plus Quests), with an Active view for what you are running.
- Filter chips (All / Available / In progress / Locked) and a search box help you find a hunt; a task is Locked if your level is outside its range.
- Tasks are repeatable, but you may only accept 5 new tasks per day. Past that daily limit you can buy an extra pick with gold (your level × 1000).
| Size | Multiplier |
|---|---|
| Easy | ×1 — base kills & rewards |
| Medium | ×2 — double |
| Hard | ×4 — quadruple |
| Rarity | Reward multiplier |
|---|---|
| Bronze | ×1 |
| Silver | ×2 |
| Gold | ×4 |
| Prismatic | ×8 |
Companion Pet Skill Trees & Levelling
Gifting Tibia Coins to Other Players
Only your transferable coins can be sent — the same pool the Player Market uses, not coins you bought directly from the shop. The recipient must belong to a different account (you can’t gift coins to your own account), and the amount is limited only by how many transferable coins you actually hold — there is no artificial per-gift cap. If the recipient is online they get an instant message: “You received X Tibia Coins as a gift from …” and their balance updates live. Every transfer is written into the Store History panel on both sides, so you always have a record of who sent what.
Automatic Looting (Autoloot)
Progression & Power
Celestial Empowerment & Arena Buff
- 🪙 Token of Celestial Empowerment
Earned by defeating monsters in the Arena to gather Arena Points, then exchanging them in the Main Hall. Usable by any of the five base vocations, requires level 500. Grants a 1-hour empowerment based on your vocation. - 🚪 999 Level Teleport
Inside the Main Hall there is a special level 999 teleport that lets you activate the same Celestial Empowerment directly (without a token) for a cost that scales with your level, paid in either currency: a floor of 1,000,000 gold (100 crystal coins), rising to roughly 5,000 gold per character level above level 200 (for example 5,000,000 gold or 500 crystal coins at level 1,000). Both payment paths stay at the same value. - ⏱️ Duration: 60 minutes for both the token and the 999 teleport version.
| Vocation | Main Offensive Bonuses | Defensive / Utility Bonuses |
|---|---|---|
| Sorcerer | +5 Magic Levels +5 Critical Hit Chance & +5 Critical Hit Damage +10% Fire Damage & +10% Energy Damage |
+500 Max Hitpoints |
| Druid | +5 Magic Levels +5 Critical Hit Chance & +5 Critical Hit Damage +10% Earth Damage & +10% Ice Damage |
+500 Max Hitpoints |
| Paladin | +5 Distance Skill +5 Critical Hit Chance & +5 Critical Hit Damage +10% Physical Damage & +10% Holy Damage |
+3 Magic Levels |
| Knight | +5 Sword, Axe, Club & Shield Skills +5 Critical Hit Chance & +5 Critical Hit Damage +10% Physical, Fire, Energy, Earth, Ice & Death Damage |
Critical & skill bonuses only — no extra HP/Mana |
| Monk | +5 Fist Fighting +5 Critical Hit Chance & +5 Critical Hit Damage +10% Physical, Earth & Energy Damage | +500 Max Hitpoints |
Evolution System
Evolutions unlock at milestone levels and grant permanent power increases. The first Evolution is available at level 1000, and each subsequent Evolution requires another 1000 levels, up to a maximum of six.
| Evolution | Required Level | Cumulative Damage Bonus (all attacks & spells) |
|---|---|---|
| I | 1000 | +5% |
| II | 2000 | +10% |
| III | 3000 | +15% |
| IV | 4000 | +20% |
| V | 5000 | +25% |
| VI | 6000 | +30% |
- Player damage, pet damage, and spell damage scaling are applied automatically to all vocations.
- Bonuses are permanent and stack with each Evolution stage.
Evolutions also increase how much health and mana you gain on each level-up. The bonus scales by vocation and by Evolution tier:
| Evolution Tier | Included Evolutions | Sorcerer / Druid | Paladin | Monk | Knight |
|---|---|---|---|---|---|
| Tier I | I–II | +1 HP / +4 Mana per level | +2 HP / +3 Mana per level | +3 HP / +3 Mana per level | +3 HP / +2 Mana per level |
| Tier II | III–IV | +2 HP / +8 Mana per level | +4 HP / +5 Mana per level | +5 HP / +5 Mana per level | +6 HP / +3 Mana per level |
| Tier III | V–VI | +3 HP / +12 Mana per level | +6 HP / +8 Mana per level | +7 HP / +7 Mana per level | +9 HP / +5 Mana per level |
Mastery Paths
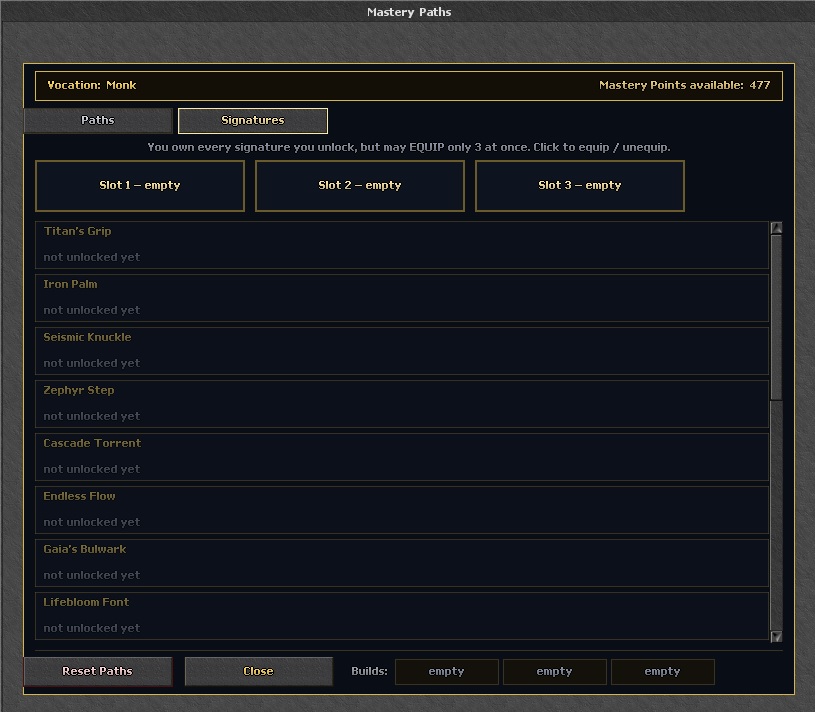
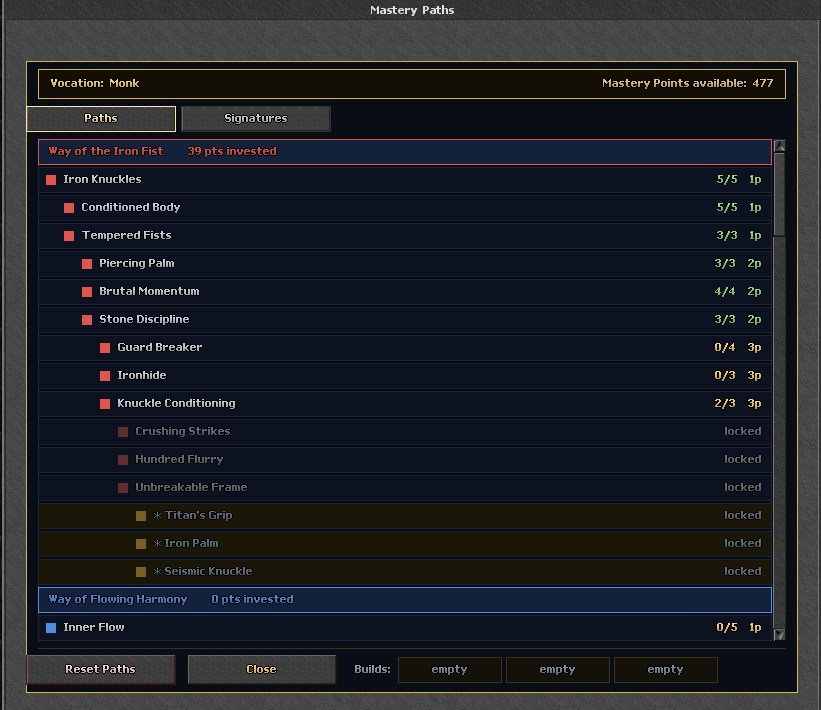
Mastery Paths is where your character truly becomes a build. Press Ctrl+U in game to open it. Every vocation has its own star map, made of six branching constellations, and you light up nodes on it by spending Mastery Points.
You don't grind for those points. They come only from one-time achievements – missions, quests, sacred discoveries and scrolls – so every point is something you earned once and place forever. Here is the catch that shapes everything: the full tree is worth far more points than you will ever have, so you can only ever fill two or three constellations. You are not completing the tree – you are choosing which corners of it define you.
- Opened with Ctrl+U; six branching constellations per vocation.
- Points earned from one-time achievements, never from grinding.
- Limited pool – you specialise into 2–3 constellations, not the whole tree.
- All bonuses apply live the instant you spend a point – no relog.
There are three kinds of node:
- Passive nodes give flat, permanent bonuses – elemental and physical damage, max HP and mana, protections, regeneration, weapon skills and magic level, mana pool. They work the moment you buy them.
- Spell nodes sharpen one specific spell – more targets, a longer field, an execute, an extra rider – and each names the exact spell it upgrades.
- Signature capstones are the gold stars at the tips of the branches, and they define a playstyle. You own one by buying it, but you must equip it to make it live – and you only get two signature slots, with a third unlocking at level 500.
You climb a constellation by prerequisites: a node stays locked until you own the ones feeding into it. Some branches are exclusive forks – the moment you buy into one side, its siblings lock out, and only a full reset undoes it.
- Reset refunds every point you have spent and clears your signature slots. The fee scales with level: 50k under level 500, 300k from 500–999, and 1kk at level 1000 and up.
- Three Build Loadout slots save whole builds and let you swap between them – loading a saved build is a free respec, so keep a hunting build and a boss build ready and flip between them.
Forge System & Tier Crystals
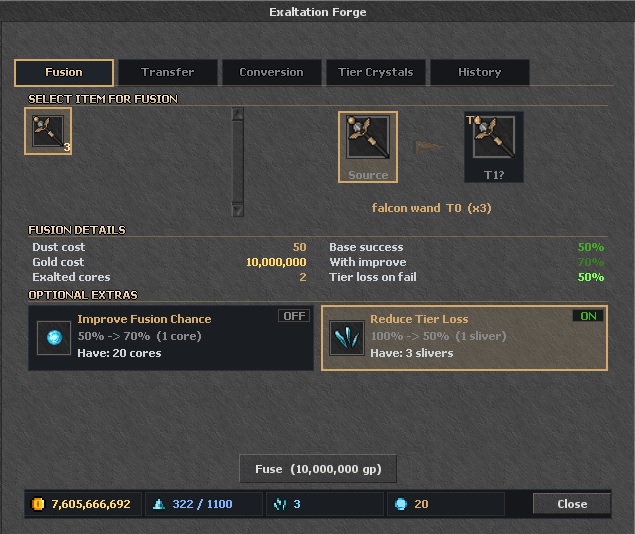
The Forge is a single Exaltation Forge window (opened at a Forge tile) with several tabs, all running on three currencies: Dust, Exalted Slivers and Exalted Cores.
- Fusion — combine two identical items of the same tier for a chance to advance one of them a tier. Spend an Exalted Core to boost your success chance, or an Exalted Sliver to soften the tier loss on a failure. Note: fusing destroys all imbuements and refinement bonuses on the item — to raise a tier without losing them, use the Tier Crystals tab instead.
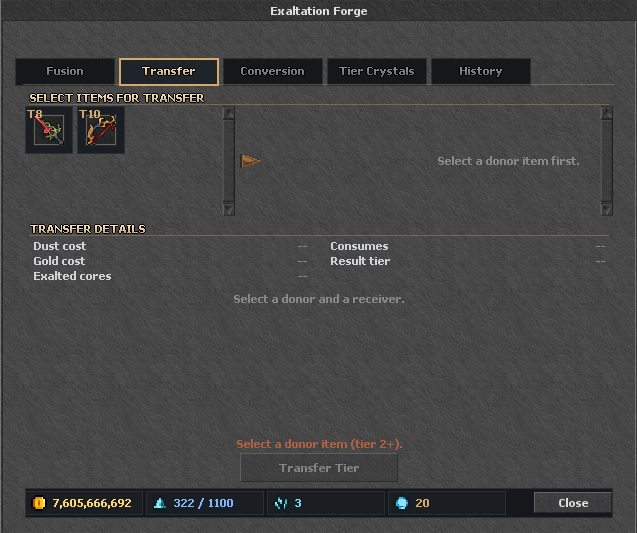
- Transfer — move an existing tier from a tiered donor item onto a tier-0 receiver (the receiver ends one tier below the donor). This consumes the donor item and can strip its bonuses.
- Conversion — convert Dust into Slivers and Slivers into Exalted Cores, or spend Dust to raise your dust limit.
- History — a log of your recent forge actions.
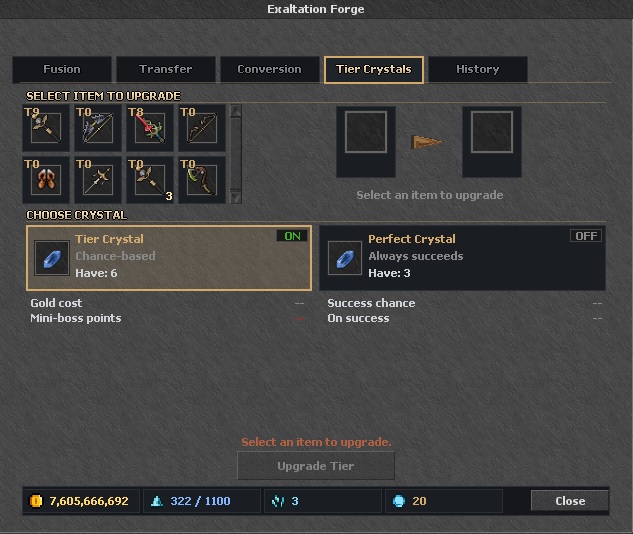
- Tier Crystals — a custom OTUniverse tab: Normal and 100% Tier Crystals raise an item tier using crystals + Mini Boss Points + gold (Normal is the cheaper gamble, 100% is a guaranteed upgrade — see below). You can also buy Normal Tier Crystals for Forge Dust right in this tab, and unlike Fusion a tier-crystal upgrade keeps the item's imbuements and refinements.
- 🔹 Use these crystals to attempt an upgrade to the next item tier.
- 🔹 Higher tiers have lower success rates — on a failed attempt your equipment may drop a tier (with a small chance to hold instead).
- 🔹 The cheaper, riskier option — for players happy to gamble on a discount.
- 🔹 Each attempt consumes the crystal and spends a Mini Boss Point plus gold, with a partial refund chance (gold and/or crystal) on a failure.
- 🔹 Buy Normal Tier Crystals for 500 Forge Dust each, using the Buy button right in this tab.
- ✔ Guaranteed upgrade to the next tier — never fails, never downgrades, no refund needed.
- ✔ Costs more per upgrade than a Normal crystal.
- ✔ 100% Tier Crystals are rare — crafted at the Crafting Table in the Temple or received as rare rewards from missions and events. No boss drops these crystals.
- ✔ Each upgrade spends a Mini Boss Point plus gold.
Mini Bosses & Tier Requirements
Mini bosses are the source of Mini Boss Points, spent together with Tier Crystals to upgrade the tier of your equipment in the Forge. There are ten mini bosses in all.
- Locate any mini boss with the Exiva Moe Fera spell followed by its name — e.g. Exiva Moe Fera "Ancient Spawn of Morgathla".
- Each mini boss must be discovered first: travel to its lair and step onto the platform tile inside the arena. The first step marks it as discovered and opens a permanent two-way quick teleport — a tile in the Boss Room that takes you straight to the boss, and the arena platform that sends you back.
- Challenging a mini boss requires level 100; only one player may fight a given mini boss at a time, and you have 10 minutes to defeat it.
- Each mini boss can be killed once every 10 hours, per player.
- Every kill grants 1 Mini Boss Point, and each tier-crystal upgrade attempt costs 1 Mini Boss Point. You can also convert 10 Boss Points into 1 Mini Boss Point at the exchange lever.
Experience & Vocation Rings
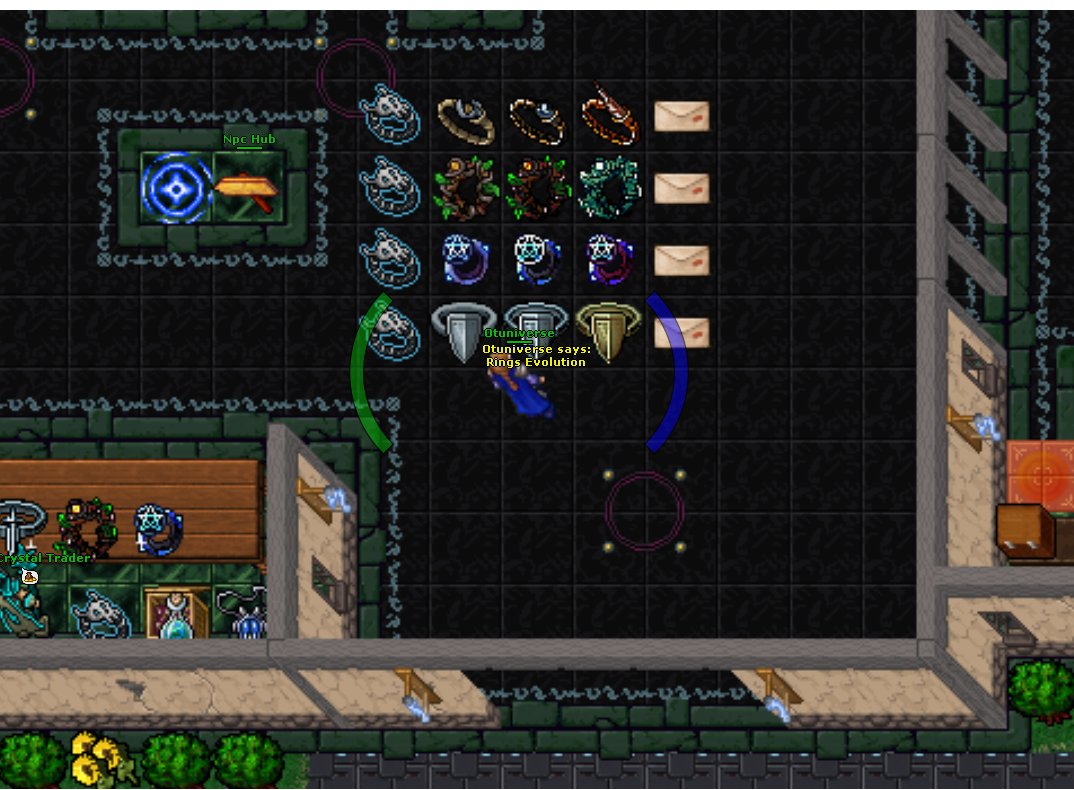
OTUniverse has two separate ring lines: permanent Experience rings, and the Crystal Trader's temporary charged combat rings.
These are permanent items: no timer and no recharging. Most are crafted at the Temple Crafting Table (a plain vocation ring + a Ring of Experience + materials). Every vocation has an Enchanted and a Legendary version — including the Monk (Ethereal) rings.
| Ring | XP rate | Also gives |
|---|---|---|
| Ring of Experience | +5% or +25% | Pure XP ring (two versions); the +5% one is also a crafting ingredient. |
| Enchanted Spiritthorn / Alicorn / Arcanomancer / Arboreal / Ethereal (Monk) | +7.5% | Vocation combat stats — elemental resistances, weapon skills, magic level, mana leech (Monk: mantra + fist skill). |
| Legendary Spiritthorn / Alicorn / Arcanomancer / Arboreal / Ethereal (Monk) | +10% | The same combat stats, stronger, plus +3% critical hit chance and +7% critical damage. |
A separate line of pure combat rings enchanted by the Crystal Trader for 20 Silver Tokens. Once worn, a charged ring runs down and then decays back to its uncharged form to be re-enchanted: the four vocation rings last 3 hours, while the all-vocation Prismatic ring lasts 2 hours. They grant resistances and skills but no experience bonus. Available families: Spiritthorn (Knight), Alicorn (Paladin), Arcanomancer (Sorcerer), Arboreal (Druid) and the all-vocation Prismatic ring. There is no Monk charged ring — the Monk ring exists only as the permanent crafted Ethereal ring above.
Tier Possibilities
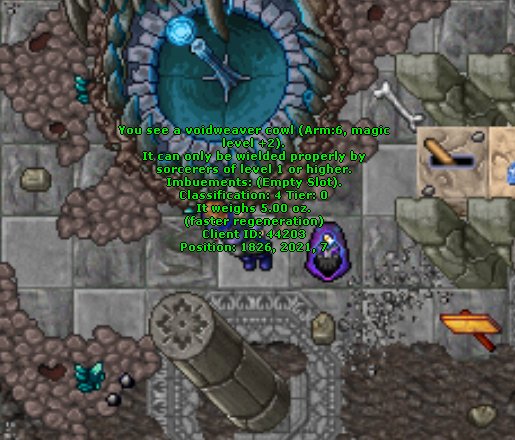
Helmets with Momentum can occasionally reduce your spell cooldowns while you have a Logout Block (battle sign). This effect is unlocked and upgraded by raising the helmet's Tier through the Equipment Upgrade system.
While in battle (and outside a protection zone), the server rolls a chance (based on Tier) on every think tick — roughly twice per second. On a successful roll, Momentum instantly reduces your active spell cooldowns — both individual spell cooldowns and group cooldowns — by 2 seconds and shows an hourglass effect.
The only cooldowns left untouched are your Avatar spells.
| Helmet Tier | Trigger Chance (per roll) | Average Triggers/Hour* |
|---|---|---|
| 1 | 2.00% | 144 |
| 2 | 4.05% | 292 |
| 3 | 6.20% | 446 |
| 4 | 8.45% | 608 |
| 5 | 10.80% | 778 |
| 6 | 13.25% | 954 |
| 7 | 15.80% | 1138 |
| 8 | 18.45% | 1328 |
| 9 | 21.20% | 1526 |
| 10 | 24.05% | 1732 |
Tip: The higher the helmet's Tier, the greater your chance of triggering Momentum!
* Estimated assuming continuous combat (the chance is rolled about twice per second while your battle sign is active).
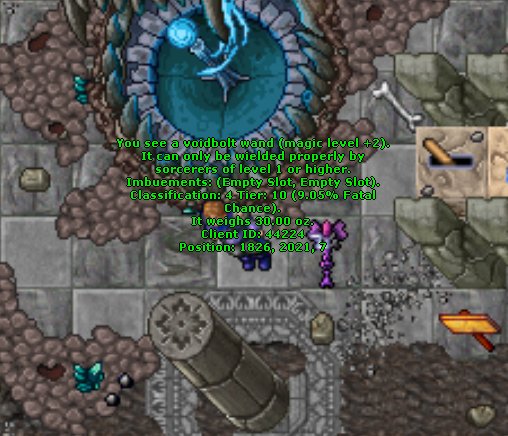
Onslaught is a unique weapon effect that gives a chance to deal Fatal Hits — massive strikes dealing +60% bonus damage.
This effect is similar to Critical Hits, but can trigger independently — meaning a hit can be both Critical and Fatal at the same time for even higher damage!
Onslaught can be added to weapons via the Equipment Upgrade system, and the chance to trigger increases with weapon Tier.
| Weapon Tier | Trigger Chance | Average Damage Increase |
|---|---|---|
| 1 | 0.40% | 0.24% |
| 2 | 0.84% | 0.50% |
| 3 | 1.36% | 0.82% |
| 4 | 1.96% | 1.18% |
| 5 | 2.64% | 1.58% |
| 6 | 3.40% | 2.04% |
| 7 | 4.24% | 2.54% |
| 8 | 5.16% | 3.10% |
| 9 | 6.16% | 3.70% |
| 10 | 7.24% | 4.34% |
Note: Both Critical and Onslaught (Fatal) can occur together for extra burst damage!
How to unlock: Upgrade your weapon Tier in the Equipment Upgrade system.
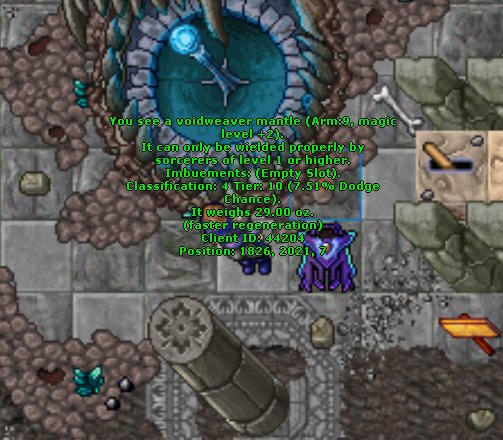
Ruse is a special effect for armors that gives you a chance to dodge attacks from creatures, similar to the Dodge Charm.
Every time you’re hit while wearing a tiered armor, there’s a chance to avoid the attack entirely.
The higher the armor Tier, the greater the dodge chance.
Ruse can be added to Armors through the Equipment Upgrade system.
| Armor Tier | Trigger Chance |
|---|---|
| 1 | 0.50% |
| 2 | 1.03% |
| 3 | 1.62% |
| 4 | 2.28% |
| 5 | 3.00% |
| 6 | 3.78% |
| 7 | 4.62% |
| 8 | 5.52% |
| 9 | 6.48% |
| 10 | 7.51% |
How to unlock: Upgrade your armor Tier in the Equipment Upgrade system.
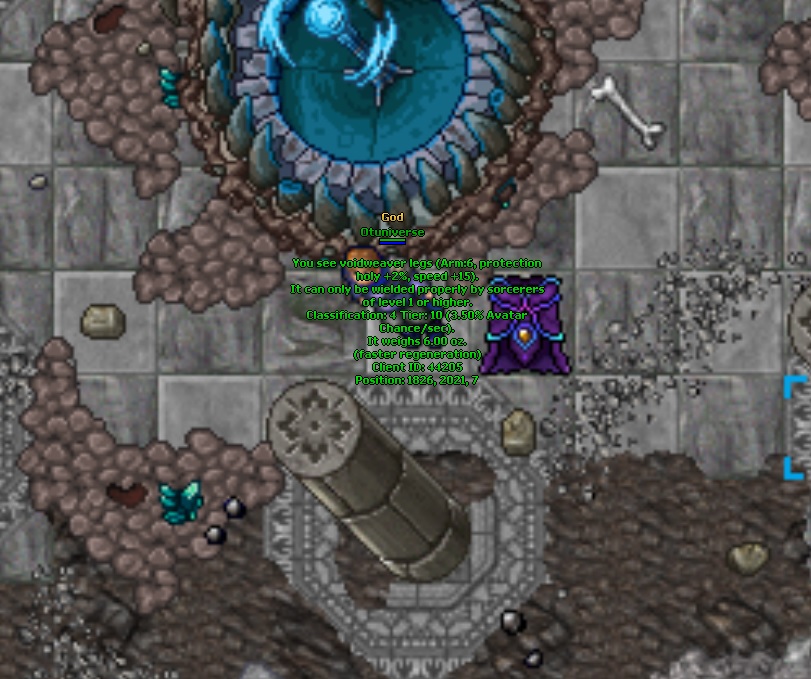
Transcendence is the Tier bonus carried by the leg slot.
While you fight in tiered legs, every second the server rolls a chance to transform you into your vocation Avatar for about 10 seconds — giving 100% critical hit chance, +20% critical damage and +10% resistance to all elements.
Upgrade your legs to a higher Tier to make the Avatar transform proc more often.
| Legs Tier | Avatar Chance / sec |
|---|---|
| 1 | 0.10% |
| 2 | 0.20% |
| 3 | 0.35% |
| 4 | 0.50% |
| 5 | 0.70% |
| 6 | 0.90% |
| 7 | 1.15% |
| 8 | 1.40% |
| 9 | 1.70% |
| 10 | 2.00% |
Tip: The Avatar roll only fires while you are actively fighting (you must have dealt damage in the last ~1.5 seconds).
Forge your legs to a higher tier to proc the transform far more often!
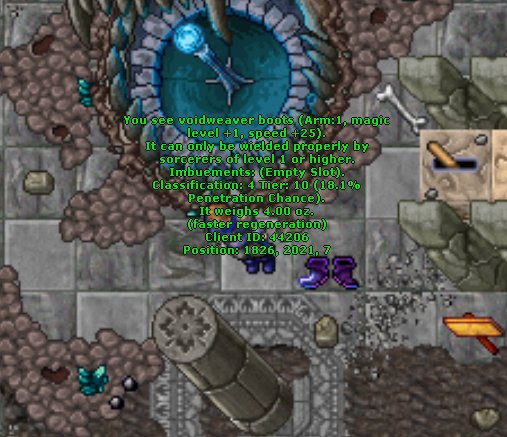
When wearing upgraded boots, each of your attacks has a chance to trigger a Penetration Hit.
A Penetration Hit will deal +30% extra damage—that's 30% more than a normal hit!
| Boots Tier | Chance for Penetration Hit |
|---|---|
| 1 | 0.50% |
| 2 | 1.05% |
| 3 | 1.70% |
| 4 | 2.45% |
| 5 | 3.30% |
| 6 | 4.25% |
| 7 | 5.30% |
| 8 | 6.45% |
| 9 | 7.70% |
| 10 | 9.05% |
- When triggered, Penetration adds 30% extra damage to your hit.
- The higher your boots’ Tier, the higher your chance to deal a Penetration Hit.
- This bonus works on both primary and secondary damage types.
Tip: Upgrading your boots increases your chance to land powerful Penetration hits—perfect for boss fights and high-defense monsters!
Empowered Monsters & Refinement Shards
- There is a small chance a teleport appears, spawning a tougher, empowered (scaled) version of the same monster.
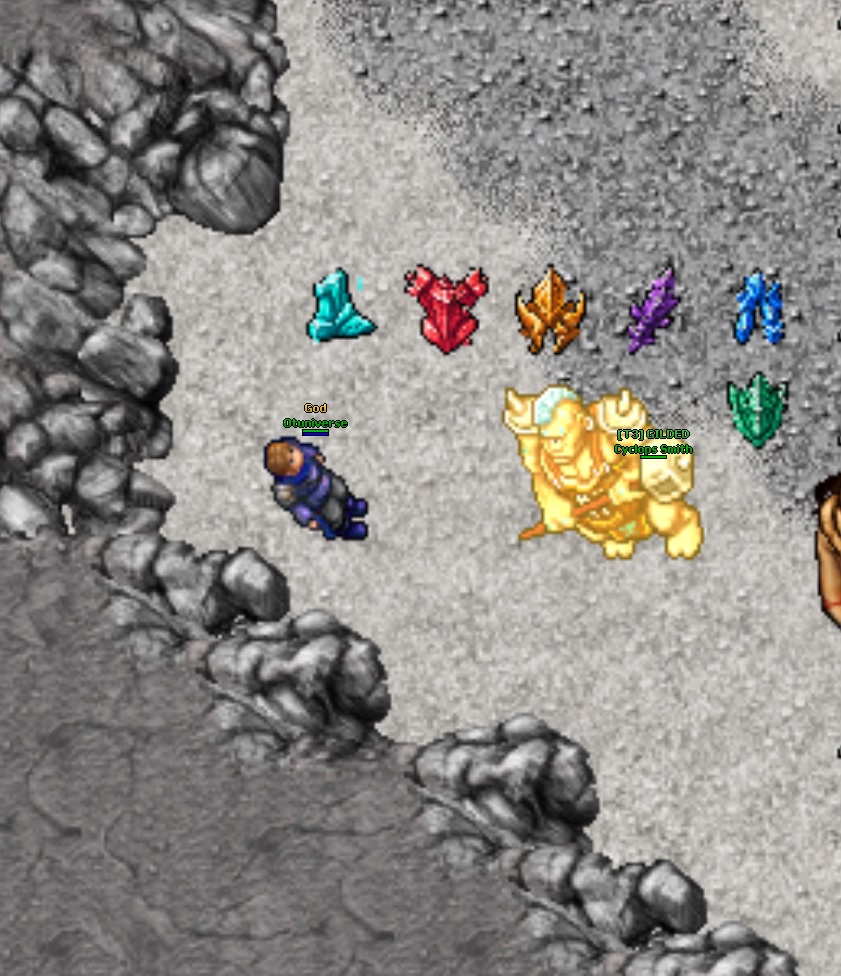
- Empowered monsters roll one of 10 tiers (Gleaming → Legendary) with steadily higher HP, damage, loot and experience.
- The tier is shown by a rarity-coloured overhead badge ([T#] RANK, e.g. “[T5] TOXIC”) plus a matching colour tint on the monster.
- Defeating an empowered monster has a chance (rising with its tier) to drop a broken shard — one of seven slot-themed fragments: broken crimson armor, gilded helmet, violet weapon, azure legguard, cyan boot, emerald shield or magenta quiver shard.
- They also grant Exaltation Forge dust equal to their tier — 1 dust at Gleaming up to 10 dust at Legendary (capped at your dust maximum).
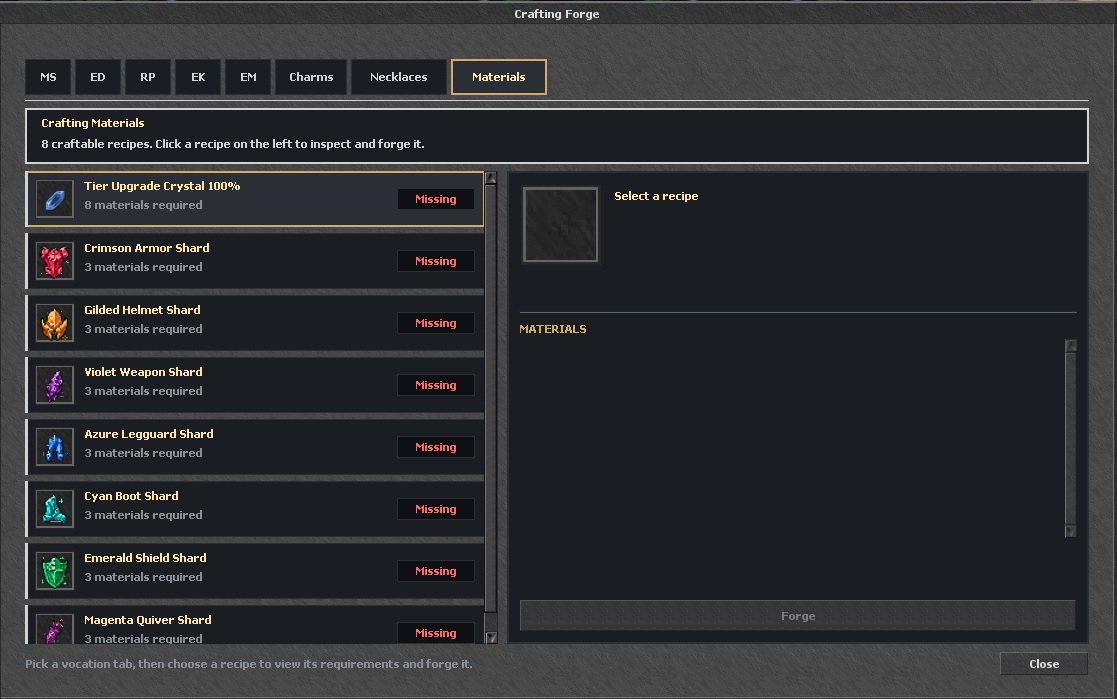
- Combine 15 broken shards of a kind at the Crafting Table to forge the finished slot shard (Crimson Armor / Gilded Helmet / Violet Weapon / Azure Legguard / Cyan Boot / Emerald Shield / Magenta Quiver Shard).
- Those finished shards are the materials the Refinement system uses to refine that gear slot — the armor shard refines body armor, the weapon shard refines weapons, and so on.
| Tier | HP Mult | Damage Mult | Loot Multiplier | EXP Multiplier | Chance to Spawn | Shard Drop Chance |
|---|---|---|---|---|---|---|
| 1 Gleaming | 1.5x | 1.15x | 1.15x | 1.6x | 1.15% | 8% |
| 2 Radiant | 2.0x | 1.25x | 1.30x | 2.1x | 0.78% | 12% |
| 3 Gilded | 2.7x | 1.35x | 1.45x | 2.7x | 0.52% | 18% |
| 4 Ember | 3.6x | 1.45x | 1.60x | 3.4x | 0.36% | 25% |
| 5 Toxic | 4.8x | 1.55x | 1.75x | 4.3x | 0.26% | 35% |
| 6 Cursed | 6.3x | 1.64x | 1.90x | 5.5x | 0.18% | 50% |
| 7 Arcane | 8.2x | 1.72x | 2.05x | 7.0x | 0.12% | 70% |
| 8 Storm | 10.5x | 1.80x | 2.20x | 9.0x | 0.075% | 90% |
| 9 Prismatic | 13.0x | 1.90x | 2.35x | 11.5x | 0.045% | 100% |
| 10 Legendary | 16.0x | 2.00x | 2.50x | 15.0x | 0.02% | 100% (2-3 shards) |
Hunt monsters to trigger empowered encounters, defeat high-tier versions for better rewards, and collect broken shards to craft into refinement shards for the Refinement system!
Level Milestone Rewards
Early tiers (50–600) give a growing stack of Otuniverse Tokens (bone tokens) and crystal coins — from 10 tokens + 10 crystal coins at level 50, scaling up to 200 tokens + 250 crystal coins at level 600. Endgame tiers (700+) hand out big token bundles plus Tibia Coin scrolls and gold bars — for example level 1000 gives 500 tokens, 5 coin scrolls and 5 gold bars, and level 4000 gives 1000 tokens, 10 coin scrolls and 10 gold bars.
Each milestone can only be claimed once per character, so your token income keeps pace with your level.
Events & Dailies
Boss Frenzy Event
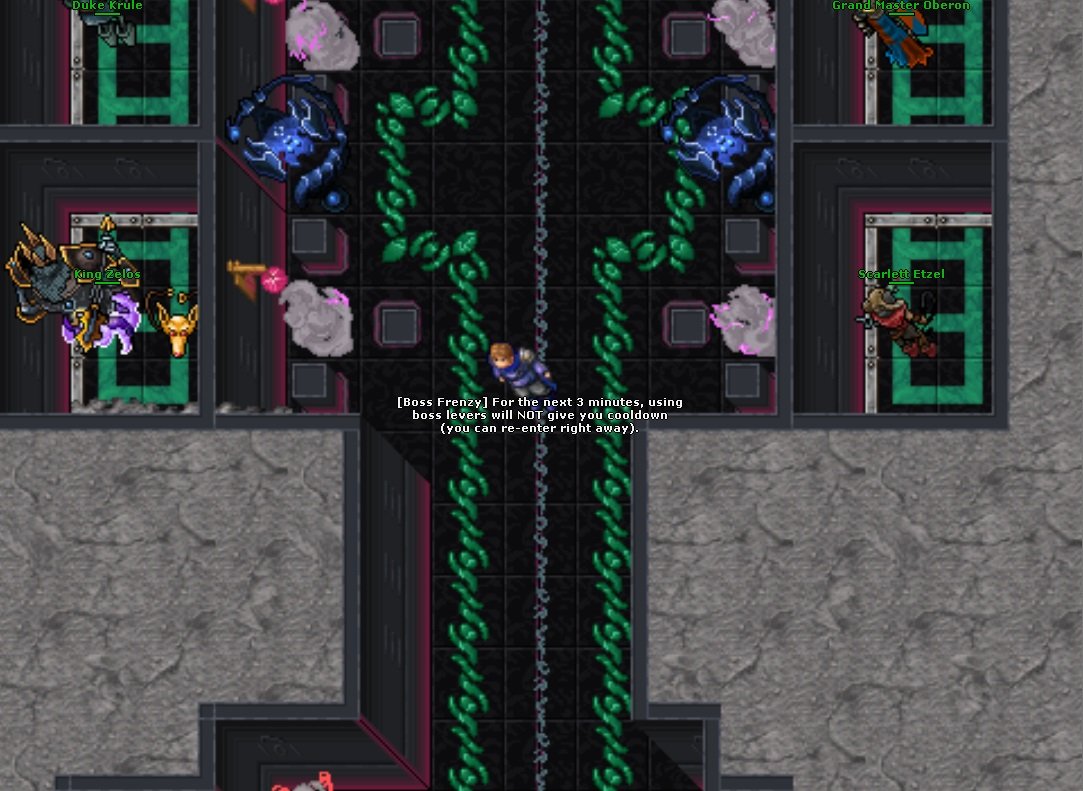
Sometimes the server will announce a Boss Frenzy. When this happens, for 3 minutes boss levers ignore their cooldown check — so you can re-enter a boss right away — but the cooldown is still applied on every entry, so there are no free resets.
- How it starts: every 30 minutes the server rolls a chance for this event. Staff can also launch it manually from the Event Hub (/events for gods, !events for players).
- Chance: each 30-minute check has a 10% chance to start one random event (Storm Invasion, Boss Frenzy, or Dungeon Bonus EXP), so Boss Frenzy is roughly a 1-in-3 slice of that 10%. Only one event runs at a time.
- Duration: 3 minutes with boss-lever cooldown checks skipped.
- No Boss Points: Players will NOT gain Boss Points for killing bosses during this event.
- Announcements: the server broadcasts when it starts and when it ends, both as a global message and in the Event Log channel.
- After it ends: boss levers apply their normal cooldown again, and any cooldown built up during the event still stands.
Tip: if you see the global message pop up, rush your boss runs immediately — it is meant to let groups chain bosses without waiting, but without giving extra Boss Points.
Daily Bosses
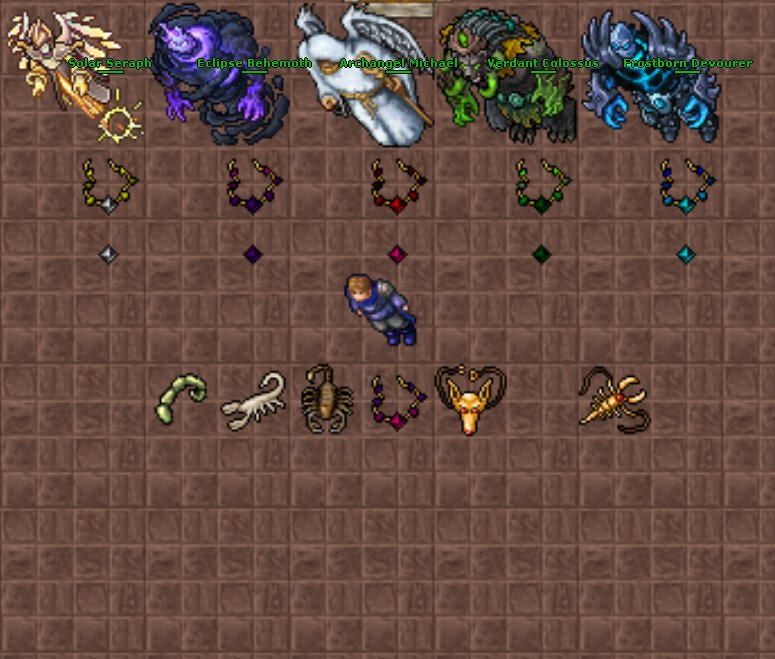
Every weekday (Mon–Fri) at 20:20 CET, a powerful boss appears. Defeat them to earn unique necklaces and special crafting essences! Each boss drops x5 essences named after their necklace reward (e.g., Emerald Essence).
| Day | Boss | Necklace | Essence | Bonus Stats |
|---|---|---|---|---|
| Monday | Eclipse Behemoth 🌑 | Amethyst Necklace 💜 | x5 Amethyst Essences |
🎯 +2% Crit Chance ⚔️ +3% Crit Damage ⚡ +6% Energy Prot |
| Tuesday | Solar Seraph ☀️ | Diamond Necklace 💎 | x5 Diamond Essences |
🎯 +2% Crit Chance ⚔️ +3% Crit Damage 🛡️ +6% Physical Prot |
| Wednesday | Frostborn Devourer ❄️ | Sapphire Necklace 🔷 | x5 Sapphire Essences |
🎯 +2% Crit Chance ⚔️ +3% Crit Damage ❄️ +6% Ice Prot |
| Thursday | Verdant Colossus 🌿 | Emerald Necklace 💚 | x5 Emerald Essences |
🎯 +2% Crit Chance ⚔️ +3% Crit Damage 🌱 +6% Earth Prot |
| Friday | Archangel Michael 👼 | Garnet Necklace ❤️ | x5 Garnet Essences |
🎯 +2% Crit Chance ⚔️ +3% Crit Damage 🔥 +6% Fire Prot |
-
Rhodolith Necklace (🛡️ Arm: 3)
Combine all 5 necklaces using their corresponding essences at the Crafting Table in the temple.
🎯 +3% Crit Chance, ⚔️ +4% Crit Damage, 🛡️ +5% Protection (All) -
Golden Scorpion Pendant (🛡️ Arm: 5) ★
Upgrade your Rhodolith Necklace for an even greater reward.
🎖️ +10% XP, 🎯 +4% Crit Chance, ⚔️ +5% Crit Damage, 🛡️ +6% Protection (All)
Elemental Raid Bosses (Daily 21:30)
Separate from the 20:20 necklace bosses, a rotating elemental world boss spawns every day at 21:30 CET. Only one boss runs at a time and the arena is auto-cleared before each spawn. Reach it through the Yellow Teleport in the Temple.
| Day | Boss | Element |
|---|---|---|
| Monday | Pyrothar the Emberlord | 🔥 Fire |
| Tuesday | Aurgoloth the Crystalline Dread | ❄️ Ice |
| Wednesday | Zephryx the Tempest Herald | ⚡ Energy |
| Thursday | Skarnyx the Rabid Scourge | 🌱 Earth / Poison (spawns a pack) |
| Friday | Auriel the Radiant Judicator | ✨ Holy (heavy self-heal) |
Dungeon Bonus EXP (Auto)
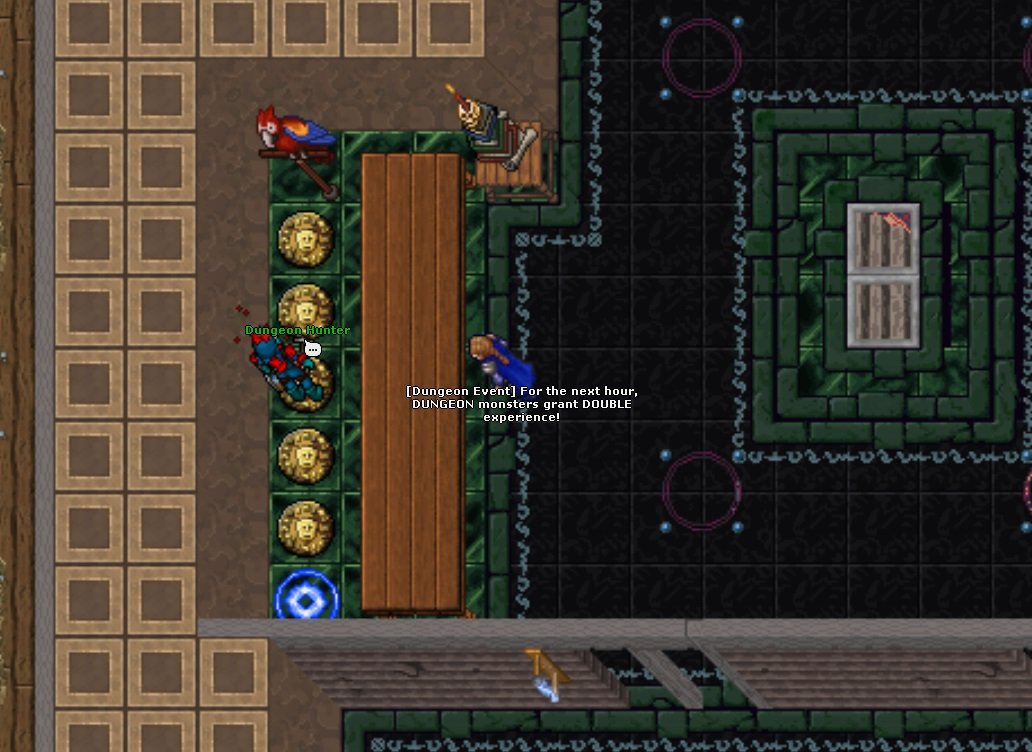
Sometimes the server activates a bonus for the dungeon areas. While this event is running, every monster inside the dungeon zone gives bonus experience — a random +25% to +50% (one value is rolled and announced for the whole event).
- How it starts: the server rolls it automatically and announces it globally.
- Duration: about 30 minutes of bonus EXP in dungeons.
- Where it works: only inside the dungeon area(s) of the server — normal map monsters are not affected.
- What to do: move your hunt to the dungeon as soon as you see the announcement to profit from the bonus exp.
- Good for: levelling, finishing tasks that require dungeon monsters, and farming with a team.
Tip: treat it like "happy 1/2 hour" for dungeons — the faster you move there after the message, the more you get.
Roulette Coin & Tibia Coins Roulette
The Roulette System offers a chance-based way to earn exciting rewards. There are two types of roulettes available: the Roulette Coin Roulette and the Tibia Coins Roulette. Each has its own entry point and reward pool.
Roulette Coins are the main currency for the standard roulette. These can be obtained through special events, daily challenges, or boss encounters. One token equals one spin!
- Stand near the Roulette Lever and use it with a Roulette Coin in your inventory.
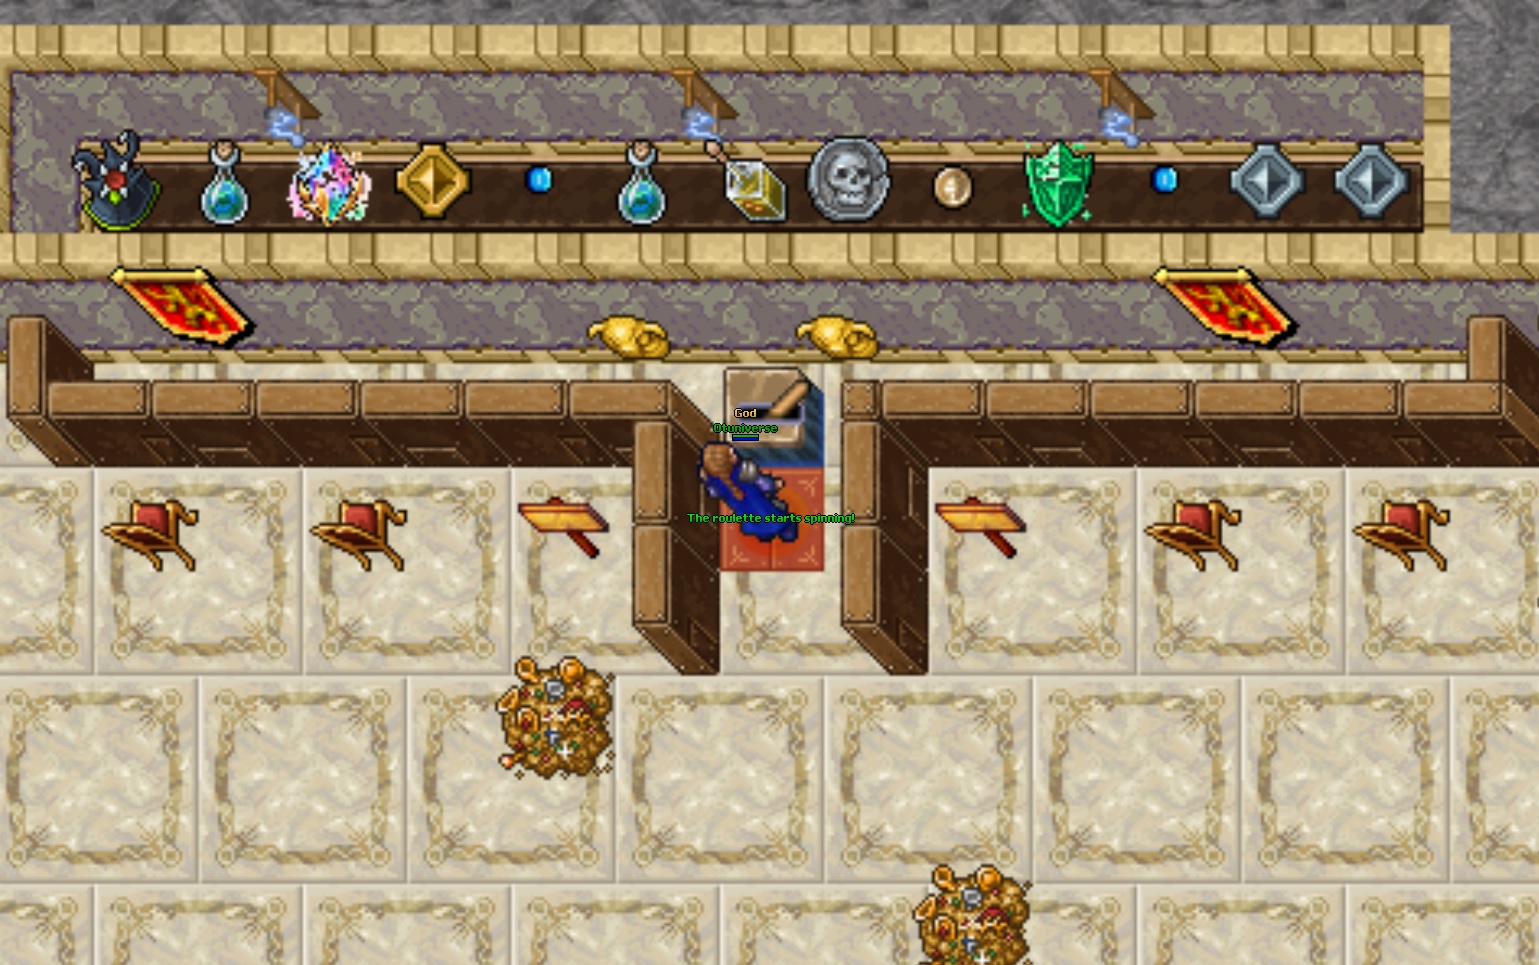
- The wheel will spin and stop on a random reward. Some rare prizes broadcast server-wide announcements!
- Only one player can spin at a time—wait for the wheel to finish before the next spin.
- Rewards range from consumables and equipment to unique and rare items.
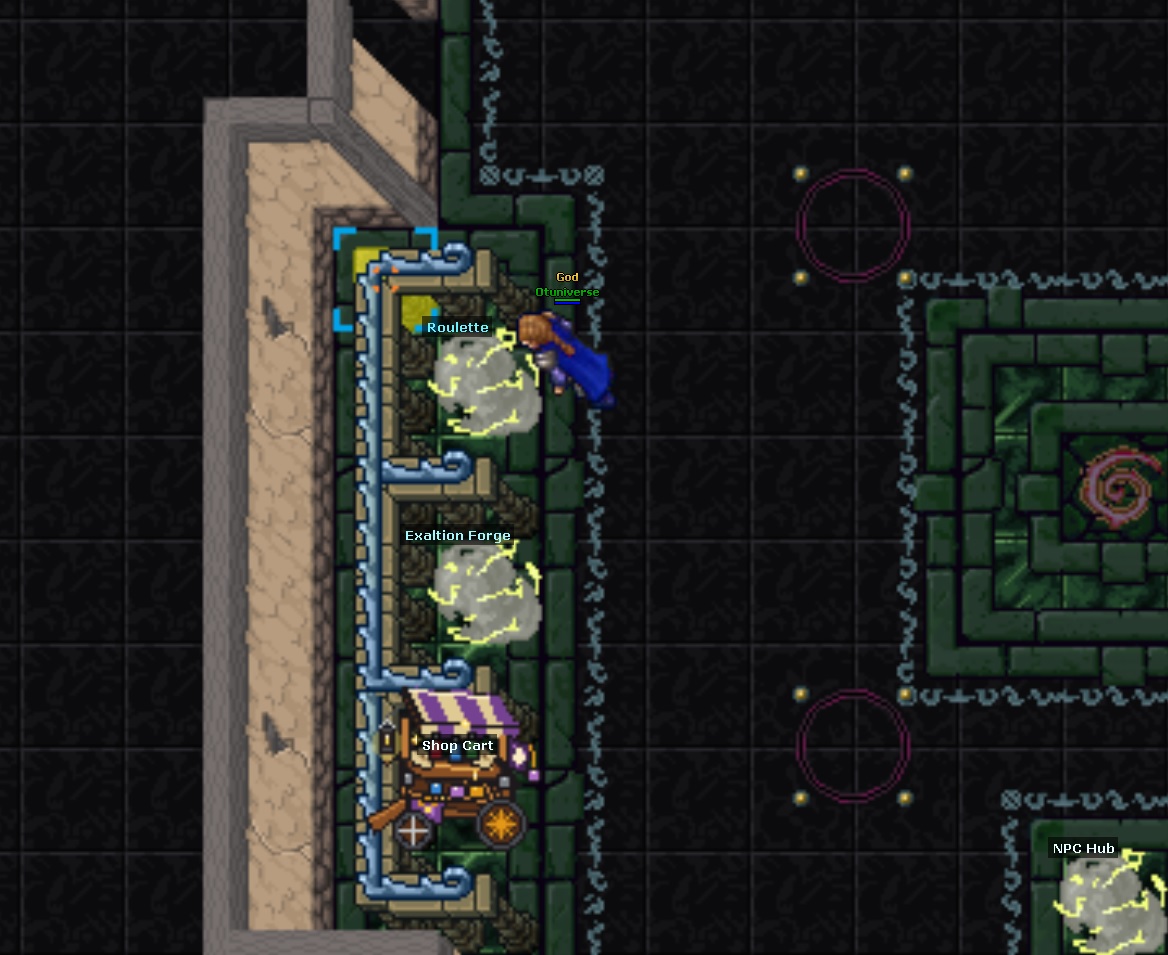
The Tibia Coins Roulette is a premium version of the system, designed for players looking for high-value rewards and cleaner loot tables. Each spin costs 35 Tibia Coins (transferable coins only — free reward coins cannot be gambled).
- Stand at the Tibia Coins Roulette lever and use it with at least 35 transferable Tibia Coins on your account.
- Each spin guarantees a reward, with significantly better chances for rare and powerful items.
- Like the token roulette, only one spin can occur at a time, ensuring fairness for all players.
- Exclusive rewards include Transferable Tibia Coins, rare artifacts, refinement shards, and top-tier gear unavailable elsewhere.
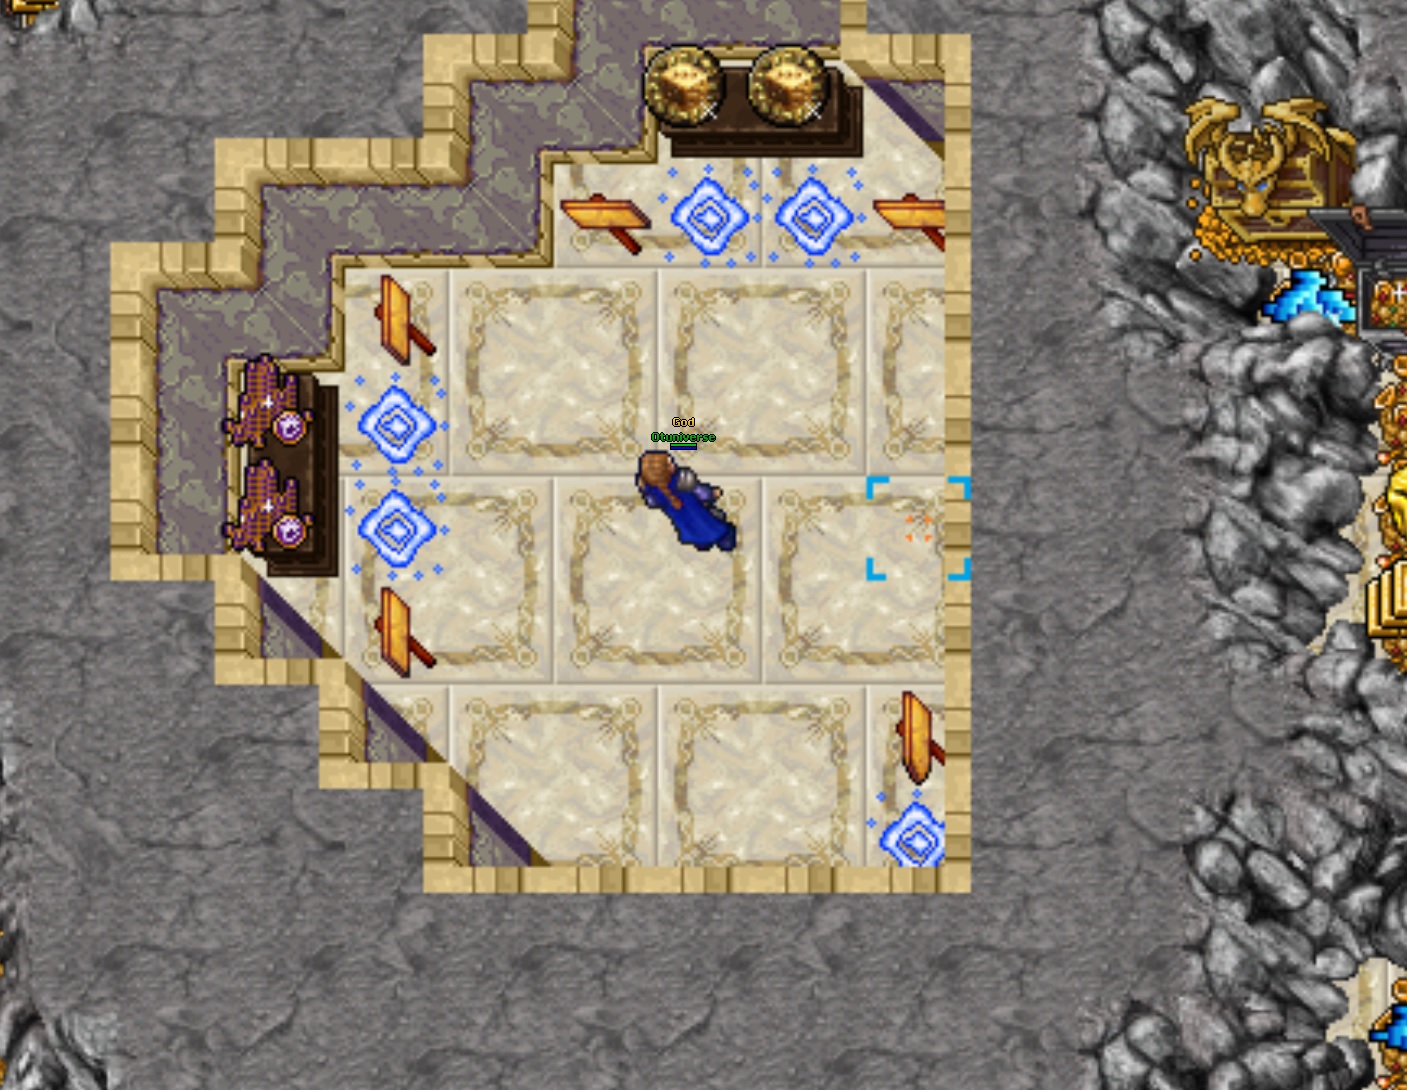
Once activated, the roulette wheel spins and lands on a random reward. The process is fast and immersive, keeping the thrill alive with every spin.
Rewards are added directly to your character, and special jackpots may even be announced globally!
Storm Invasion (Auto)
From time to time a magical storm rolls over the city. While the storm is active (about 5 minutes) it rains, and dark wizards conjured from the rain appear on tiles around players who are outside — mostly common Dark Wizards, with rarer Death Eaters and Bellatrix Lestrange, and a very rare chance at Voldemort. The rarer spawns carry the best loot, so it pays to hunt them quickly.
- How it starts: it is one of the server's random events (a small chance rolled every 30 minutes) and a global message announces it. Staff can also launch it from /events.
- Duration: ~5 minutes of rain and event spawns.
- Where to go: be outside where the rain reaches you; spawns form on tiles around you. Standing in a Protection Zone gives no rain, lightning or spawns.
- Watch out: the storm can occasionally strike you with a bolt of energy while you are out in the rain (never inside a PZ).
- Track it: the storm and the server's other live events are listed in the Event Hub (!events).
- End: when the storm fades, spawns go back to normal.
Tip: when you see “A magical storm is brewing! Rain may spawn dark wizards around the city!”, head outside and hunt the storm mobs — it's a short window.

Wave Arenas (Maximus Arena Points)
You have 30 minutes to clear all waves before you are teleported out, only one player may occupy an arena at a time, and each arena has its own 20 hour cooldown charged the moment you enter. Spend your Arena Points at Maximus Decimus: 50 points convert to one arena badge, which buys the “of Maximus” weapon line (30 badges), endgame Proximo & Maximus armors (60 badges), refinement shards (5 badges) or a Prismatic Forge Crystal (12 badges).
Elemental Dungeons (Party Instances)
Each dungeon is a private copy reserved for your group, so a second party can never drop into your run and reset your progress. Your job is to clear the dungeon's creatures. Rewards come as you go — at 25%, 50% and 75% cleared, every party member inside earns Dungeon Tokens and a handful of broken refinement shards (repaired at the crafting table into gear-refinement shards), and support players who dealt no damage still get paid as long as they were on the reserved run. Clearing the quota then summons the dungeon's boss (a “Real” elemental champion); defeating it drops a reward chest to everyone who took part — more Dungeon Tokens, crystal & bone tokens, refinement shards and a chance at rarer prizes — along with a large chunk of experience. Payouts scale with the dungeon's tier, so the higher elemental dungeons hand out more per milestone and per boss.
Pair a run with the Dungeon Double-EXP event for the best experience, and cash your tokens in with the Dungeon Trader afterwards.
World & NPC Content
Aurelius Doubledore
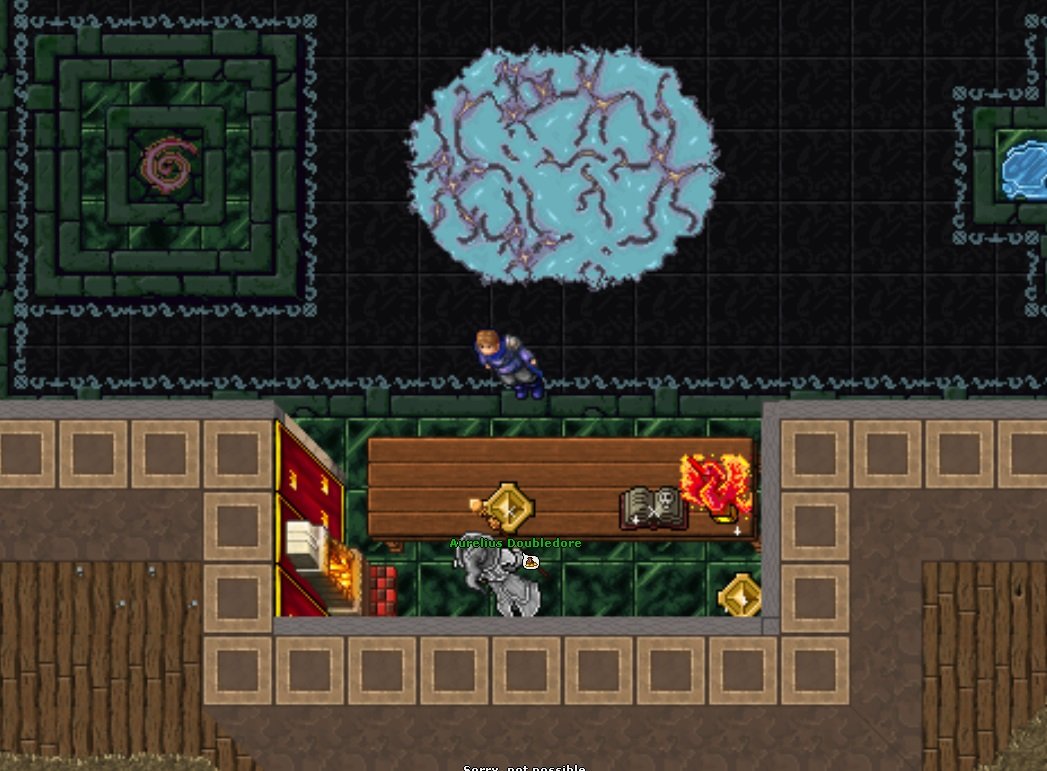
Aurelius Doubledore is the gold-token version of the shop. He trades only for Gold Tokens.
- Currency: Gold Tokens (rarer than silver).
- Offers: strike, charm, stamina, wealth items and premium gear.
- Missions: none — direct shop.
Crystal Trader - Cave Mining
- Access: finish all Pirate Trader missions to reach the cave, and complete Bear Hugger missions to use the Multi Tool that reveals the buried entrance. To start mining you must also finish the Crystal Trader's own mission chain.
- Mining tool: the everyday mining tool is now the Vein Cracker, bought from the Crystal Trader for 10,000 gold once you have completed his missions. (The old Magic Pickaxe is now a reward from that same mission chain and is only used on special quest crystals.)
- Mining: use the Vein Cracker on a crystal vein to open a short timed strike mini-game — land your hits in the sweet spot for higher quality. Better timing, together with a random node grade (Rough, Fine, Superior, Exceptional or Pristine), rolls more and rarer loot.
- Mining skill: mining raises your Mining skill (shown in the Skills window). A higher skill unlocks tougher, richer vein tiers — blue from the start, then red, green and black as your skill climbs.
- Loot: veins drop coins, gems and pearls, Strange Crystals (the Crystal Trader's shop currency) and, rarely, silver, gold or bone tokens.
- Recharge & shop: each Vein Cracker holds 50 uses; recharge it at the Crystal Trader for 5 Silver Tokens. Spend your Strange Crystals at his shop on strike, charm, stamina and wealth items, water of redemption and an enchanted prismatic ring; he also enchants and recharges certain rings and amulets.
Dungeon Hunter
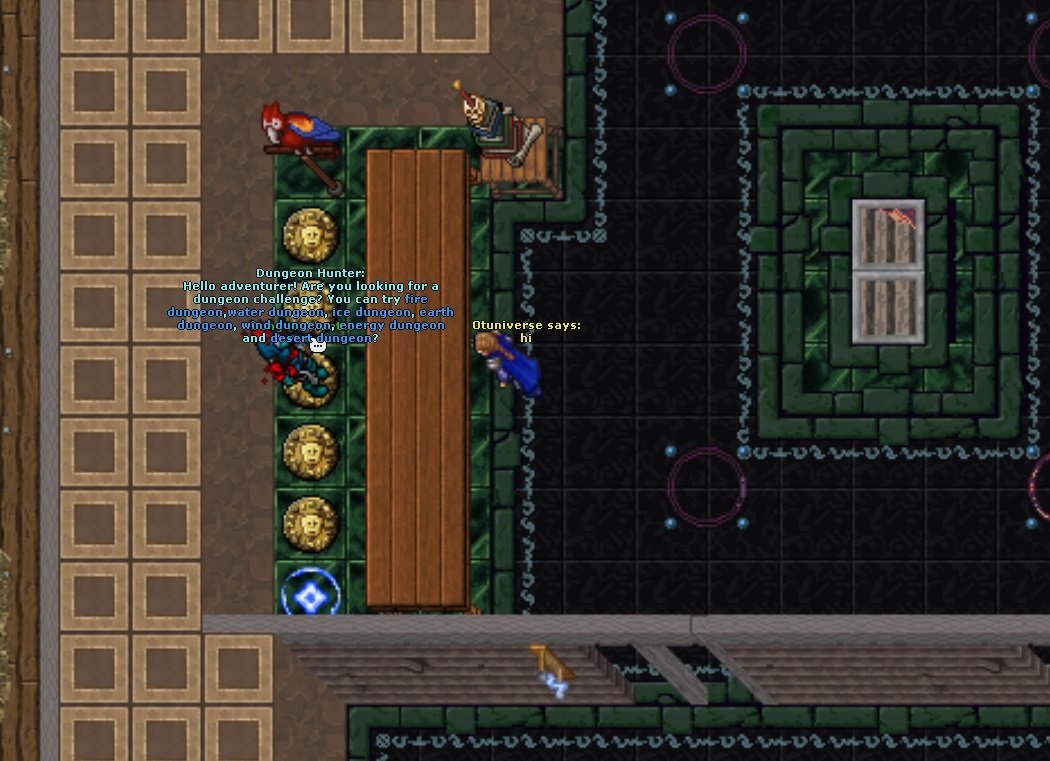
The Dungeon Hunter controls access to the element-themed dungeon rooms (Fire, Water, Ice, Earth, Wind, Energy, Desert, Volcanic).
- Function: teleports you — or your whole party — into a private dungeon copy.
- Dungeons: fire (400+), water (600+), ice (800+), earth (1000+), wind (1500+), energy (2000+), desert (2500+), volcanic (3500+).
- Copies: each dungeon has several identical copies; you are placed in a free one and two groups never share a copy. A copy releases automatically on a wipe, on logout, or once the boss is killed.
- Daily limit: 3 runs per day (4 for VIP / Premium).
- Rewards: small Dungeon Token payouts at 25% / 50% / 75% cleared, plus a boss reward chest (Dungeon Tokens, crystal & bone tokens, refinement shards and rare bonus loot).
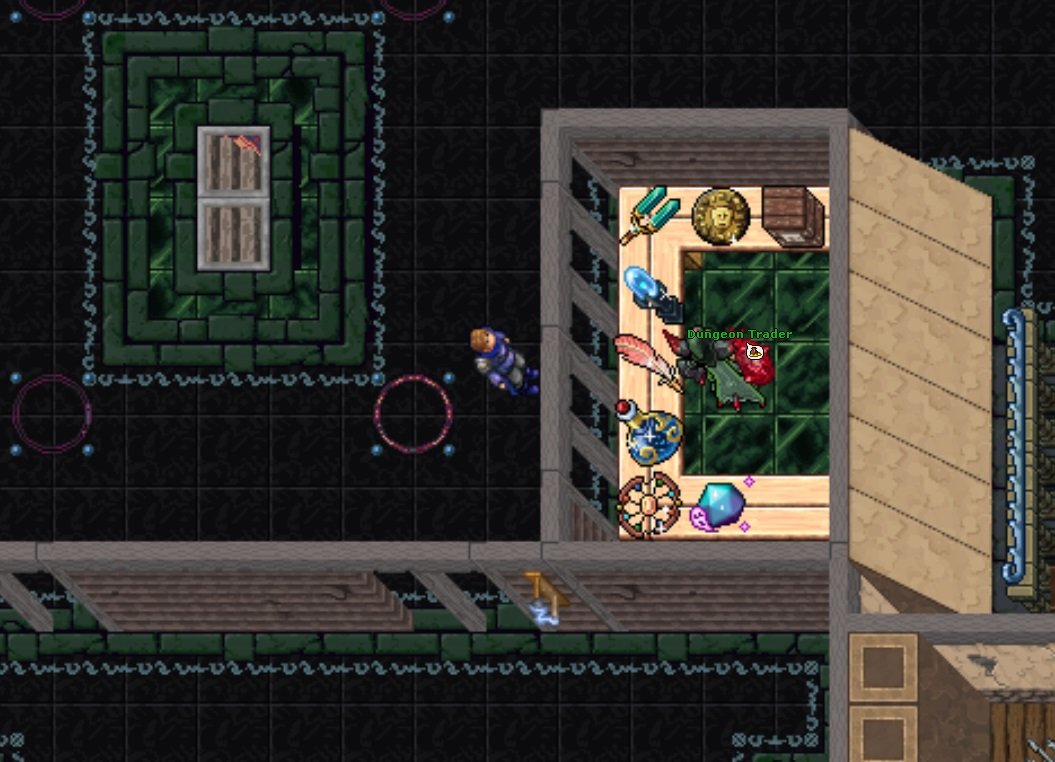
Dungeon Trader
The Dungeon Trader is the reward NPC for dungeon runners.
- Currency: Dungeon Tokens.
- Sells: a set of base charms (500 tokens each) and finished refinement shards (350 tokens each) for gear refinement.
- Great charms: not bought here directly — buy a base charm from the Trader, loot a charm upgrade inside the dungeons, then craft the great charm at a crafting table.
- Missions: none — pure exchange.
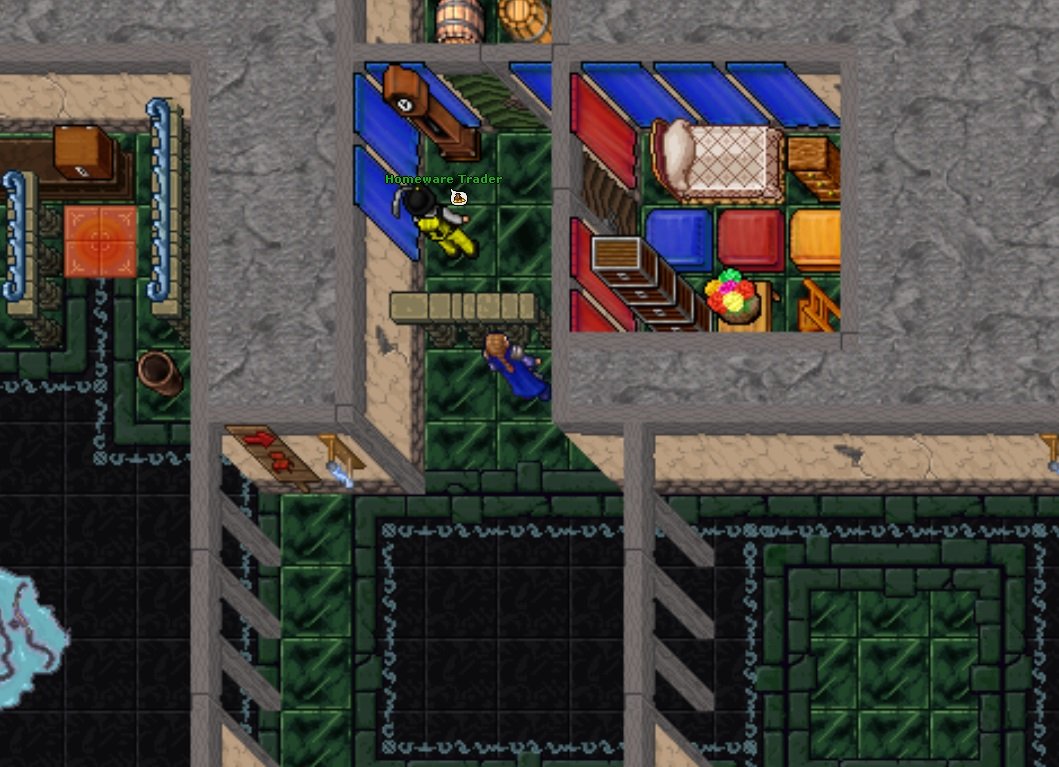
Homeware Trader
The Homeware Trader sells decoration and furniture for houses.
- Sells: furniture kits, beds, statues, clocks, plants, tables, tapestries.
- Missions: none.
- Location: temple / main hall services area.
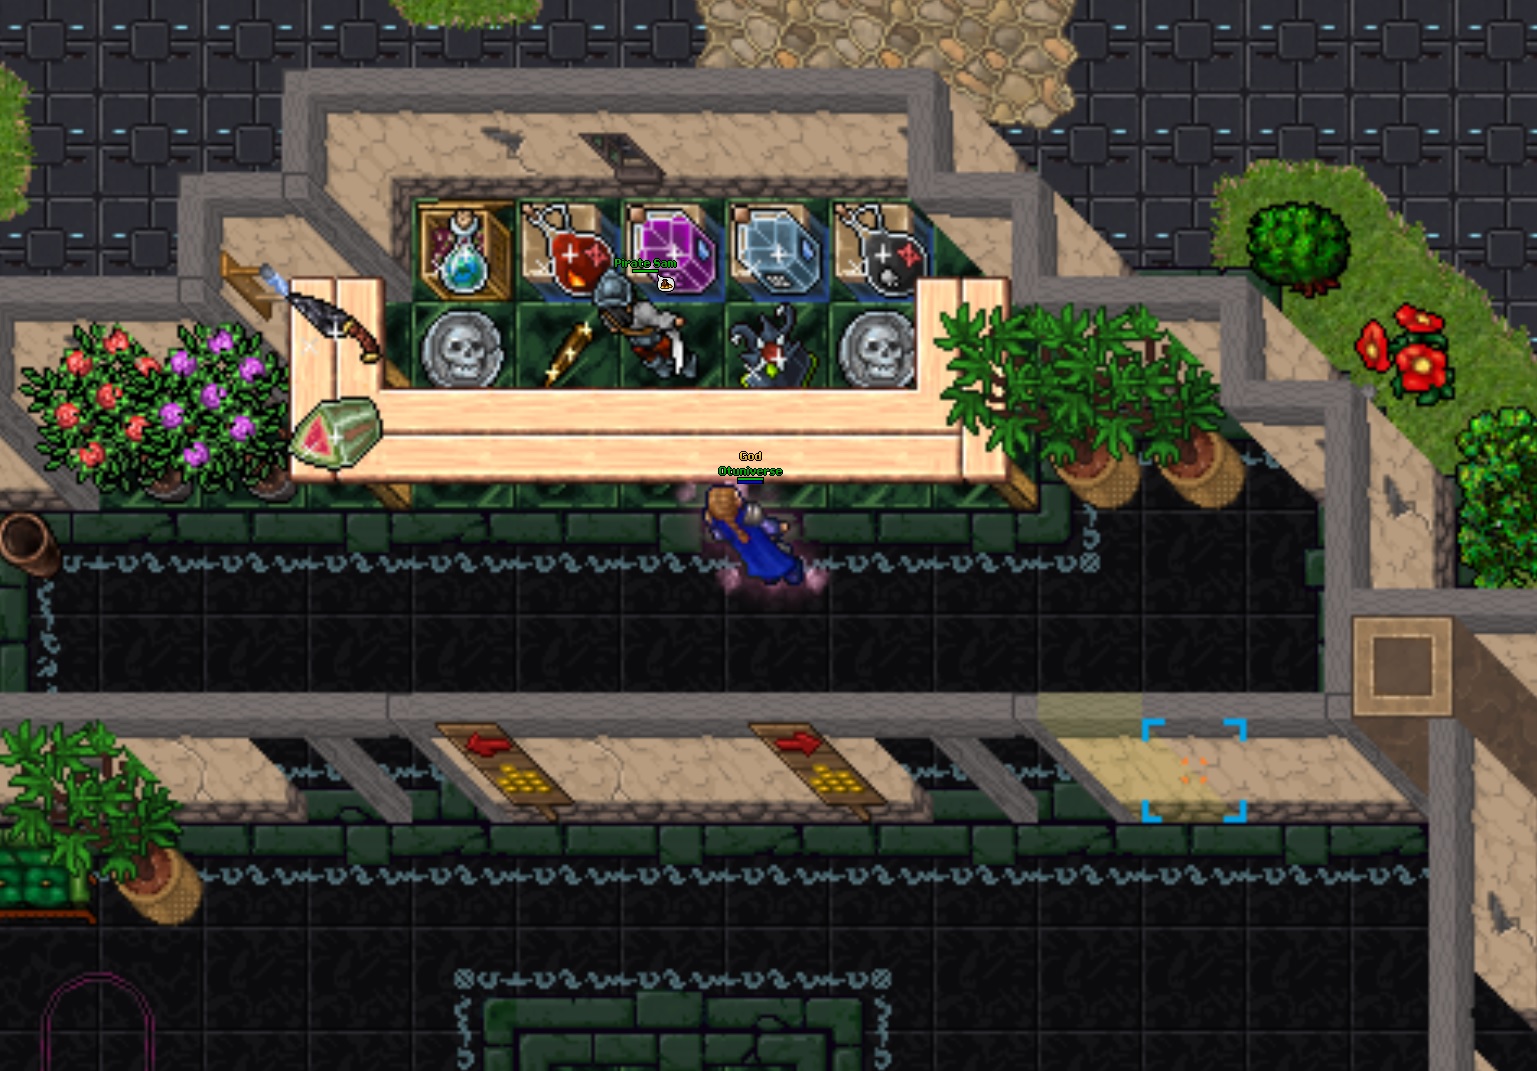
Pirate Sam
"Arrr, welcome matey!" Pirate Sam trades exclusively in Bone Tokens. He is your go-to for elemental concoctions – short, powerful combat buffs – plus a handful of handy utility items.
Note: Pirate Sam no longer sells XP Boosts or Prey Wildcards. Those are now bought with Gold Coins in the Exchange System.
| Concoction | Effect | Price |
|---|---|---|
| Amplification fire / ice / earth / energy / holy / death / physical | +8% damage of that element | 100 Bone Tokens |
| Resilience fire / ice / earth / energy / holy / death / physical | +8% resistance to that element | 50 Bone Tokens |
Grab the amplification that matches your own damage type, and the resilience that matches what you are fighting.
- Obsidian Knife – 200
- Blessed Wooden Stake – 200
- Water of Redemption – 400
- Lisa's Doll – 800
- Wealth Duplex – 1200
Royal Addoner
The Royal Addoner lets you unlock outfit addons or even get full outfits in exchange for specific items.
- Services: addons for many classic outfits.
- Cost: bring the required items (varies per outfit/addon).
- Missions: none.
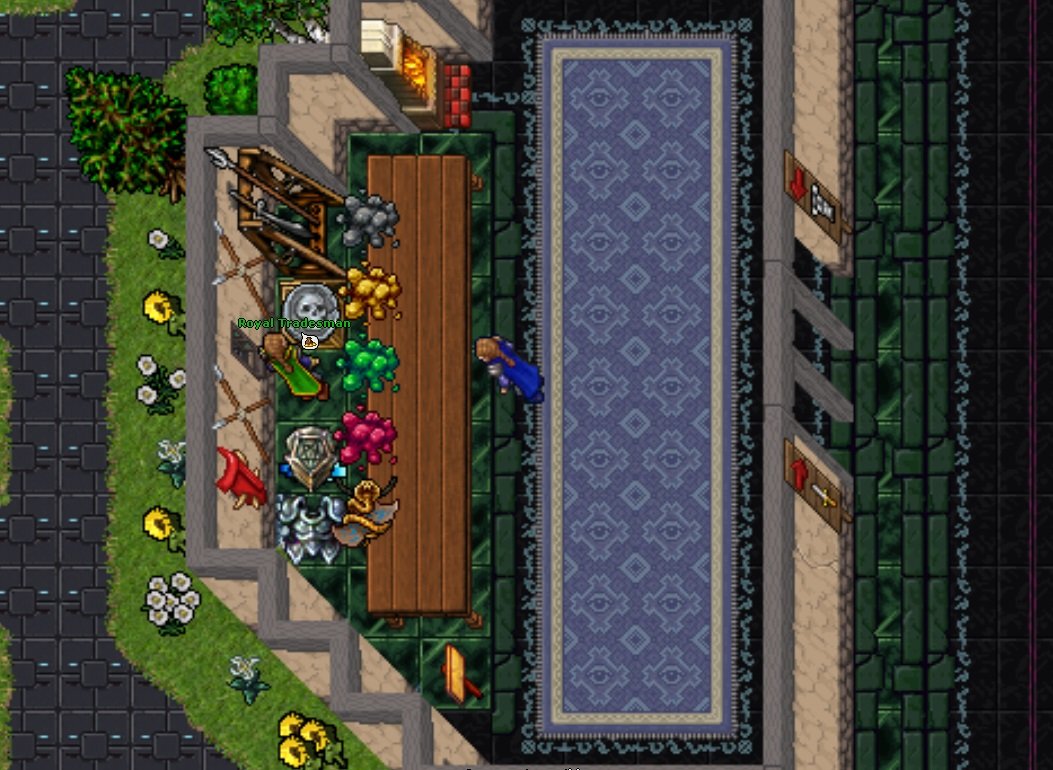
Royal Tradesman
The Royal Tradesman is the main buyer NPC for loot and profit items.
- Buys: vocation profit items (such as Eerie Song Book rewards) and various valuable drops.
- Location: Main Hall, west side.
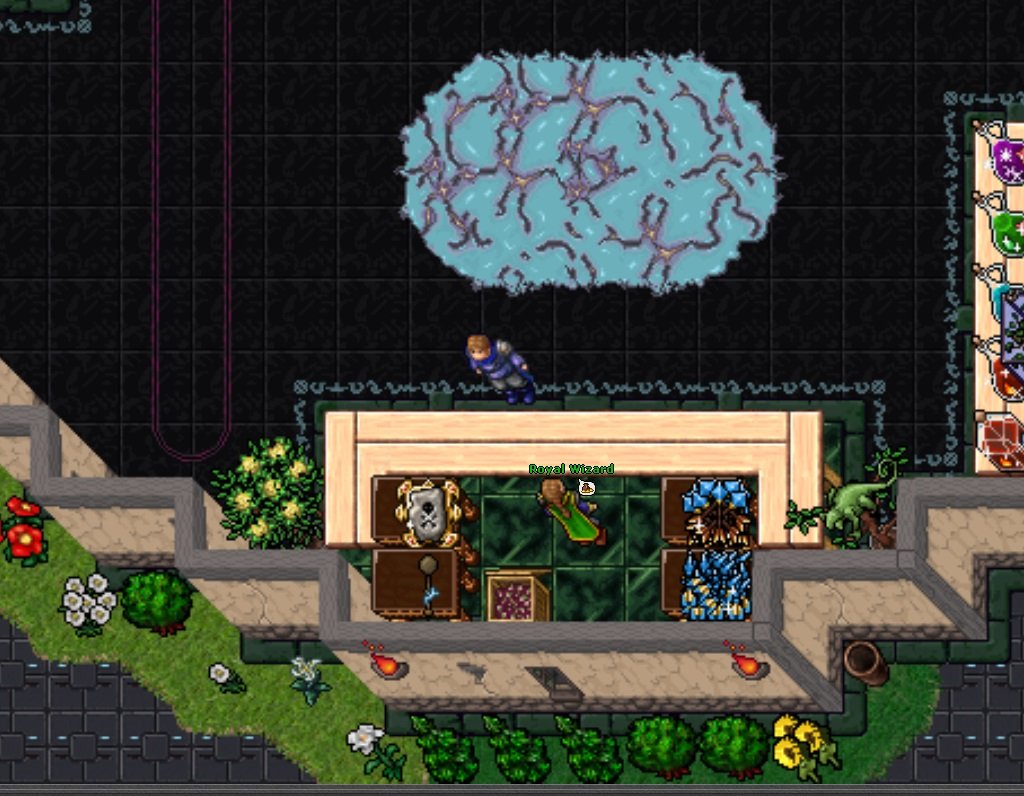
Royal Wizard
The Royal Wizard is the main magic and ranged supply NPC.
- Sells: attack & support runes, health / mana / spirit potions (up to epic tiers), wands and rods, bows and crossbows with all ammunition (arrows, bolts, quivers, spears, throwing stars), and elemental amulets / necklaces plus plasma rings and collars.
- Missions: none.
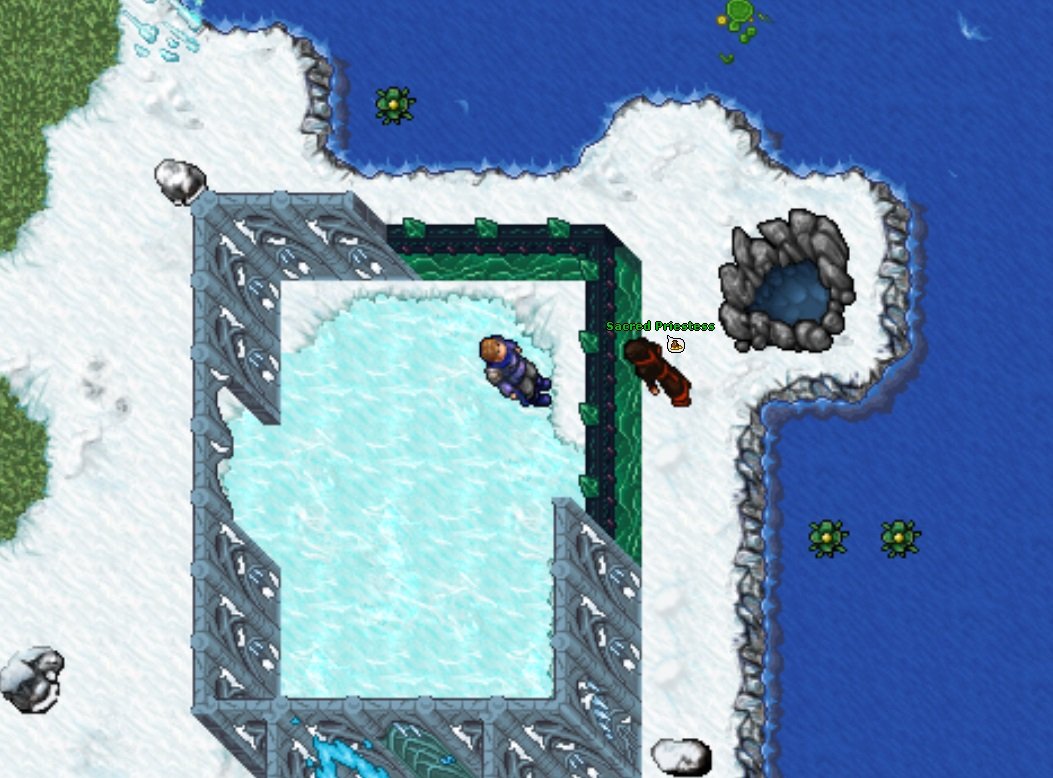
Sacred Priestess
The Sacred Priestess is a special supply NPC tied to the discovery of the sacred ponds, and she also guards a hidden secret for dedicated explorers.
- Trade: open to all players — say trade to buy her priestess mana, health and spirit potions.
- Sells: priestess mana/health/spirit potions.
- Secret ring: the priestess holds the key to a special ring that grants critical hit chance and critical hit damage. The ring is a hidden reward for dedicated explorers who complete the sacred-pond discoveries.
- Basement access: after finding all 12 sacred ponds, you can unlock the basement doors beneath her temple, gaining access to her hidden chambers.
- Extra: can exchange a magic vial into a random amount of priestess potions.
- Missions: not shown — unlocking is based on exploration and secrets rather than a classic mission log.
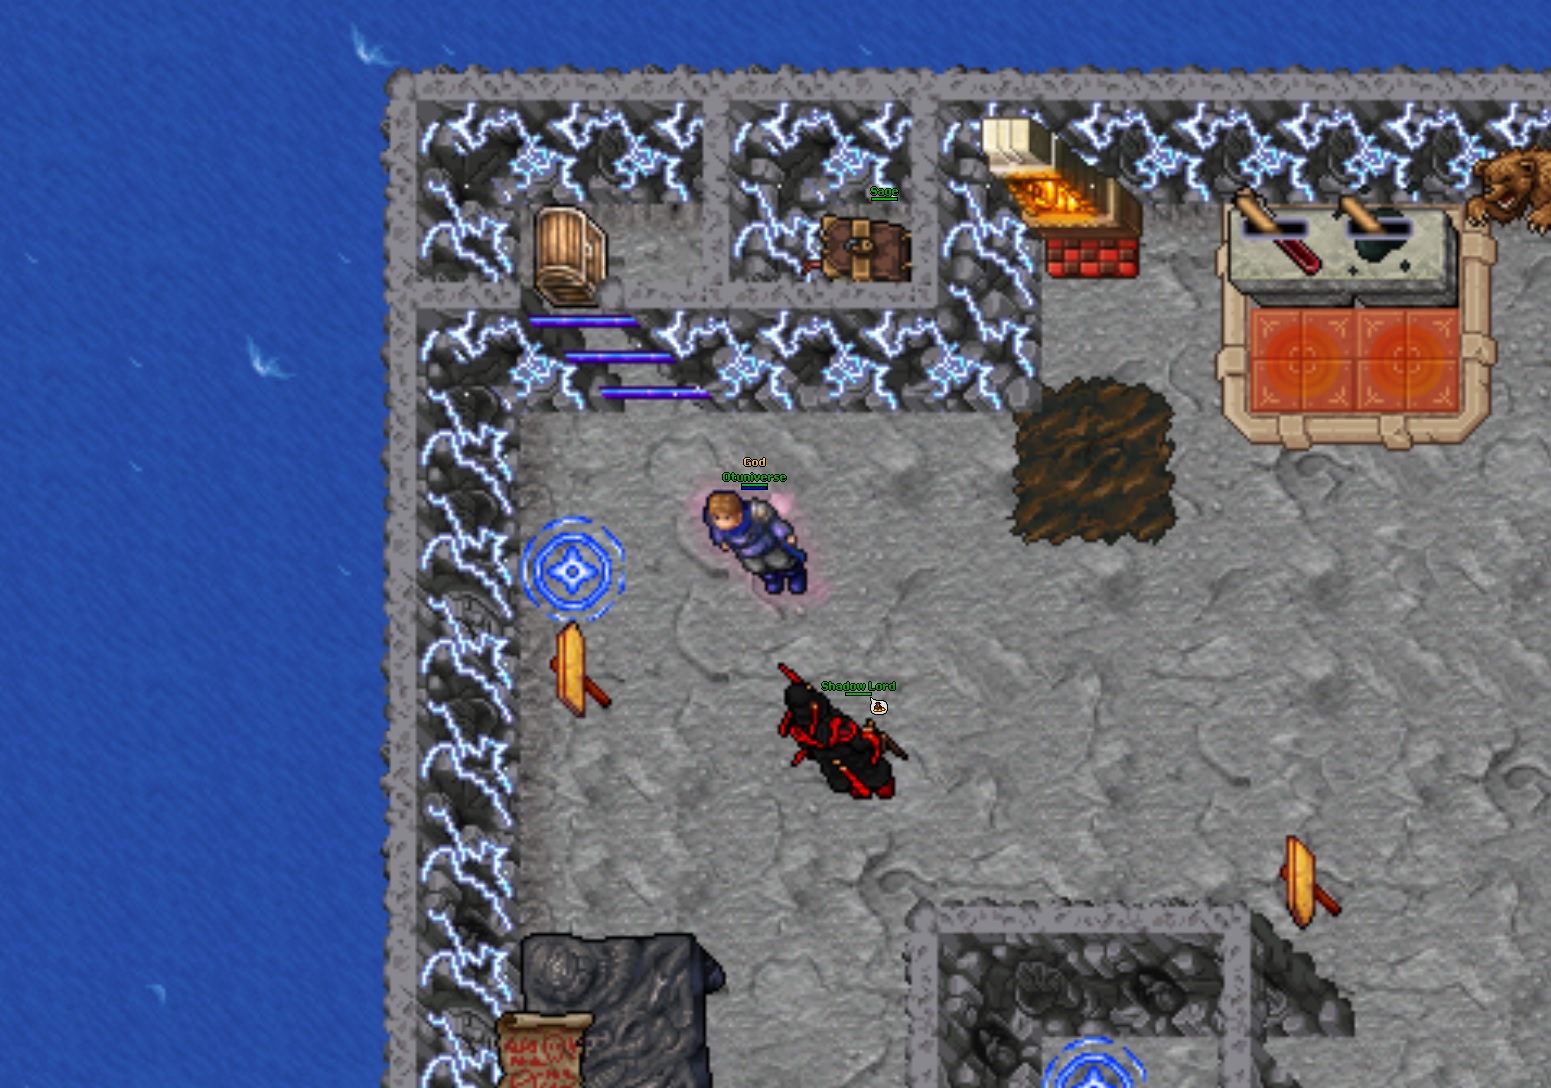
Shadow Lord
The Shadow Lord sets a long chain of nine trials. Say {mission} to begin, and return to him as you finish each one. Complete every trial and he binds a loyal Sage companion to your side – summon it from your companion panel (Ctrl+J). Finishing the chain also unlocks his trade.
| # | Trial |
|---|---|
| 1 | Gather 40 Dark Essences from Fallen Necromancers. |
| 2 | Collect 25 Corrupted Blood Samples from Cursed Spiders. |
| 3 | Retrieve the Spirit Container from the Lava Pit. |
| 4 | Hunt Lavafungus and gather 500 of their heads. |
| 5 | Defeat the Necromancer Lord and retrieve the Staff of Shadows. |
| 6 | Collect 15 Yeti Slippers. |
| 7 | Find the Knowledgeable Book. |
| 8 | Defeat The Welter, a fearsome mini-boss. |
| 9 | Find the King's Crown. |
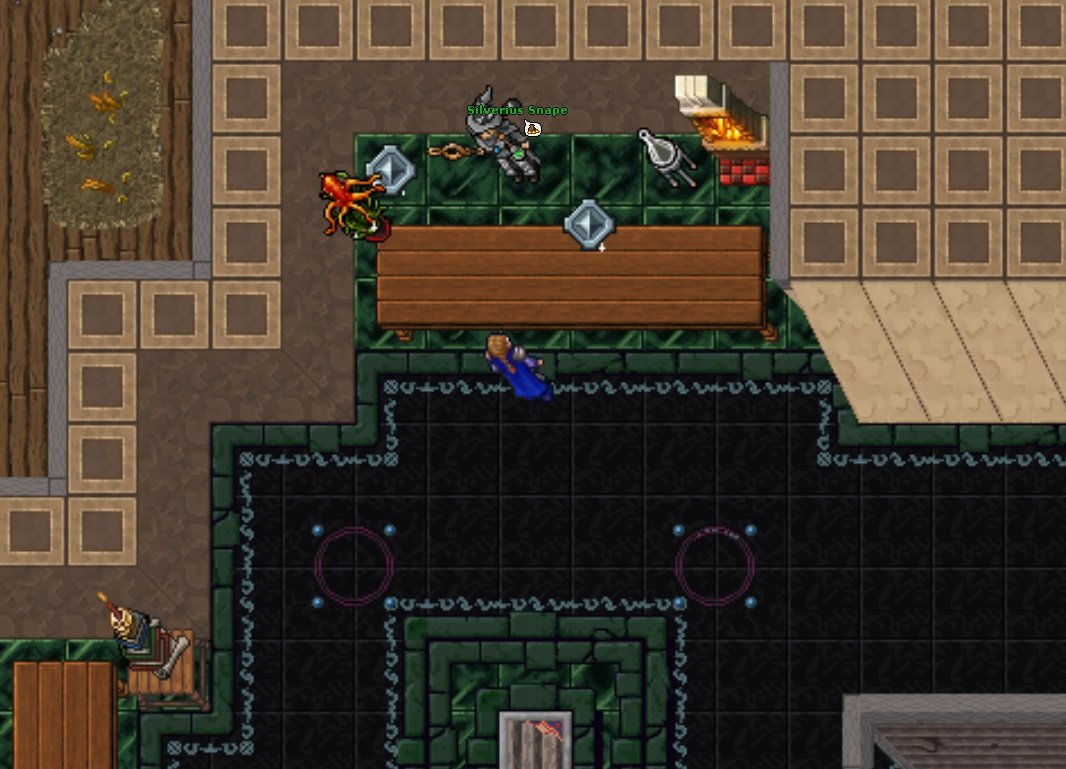
Silverius Snape
Silverius Snape is a special-currency trader that deals only with Silver Tokens. He runs no missions – just say {Silver Tokens} to open his shop.
| Offer | Price (Silver Tokens) |
|---|---|
| Strike Enhancement | 50 |
| Charm Upgrade | 150 |
| Stamina Extension | 200 |
| Wealth Duplex | 400 |
| Water of Redemption | 250 |
| Sceptre of Sun and Sea | 5000 |
Thalorin the Archer
Thalorin the Archer offers a small storyline for hunters/rangers.
- Total missions: 6.
- Mission types: hunting, bringing items, final strong kill.
- Reward: unlocks his shop with premium arrows/bolts and special runes.

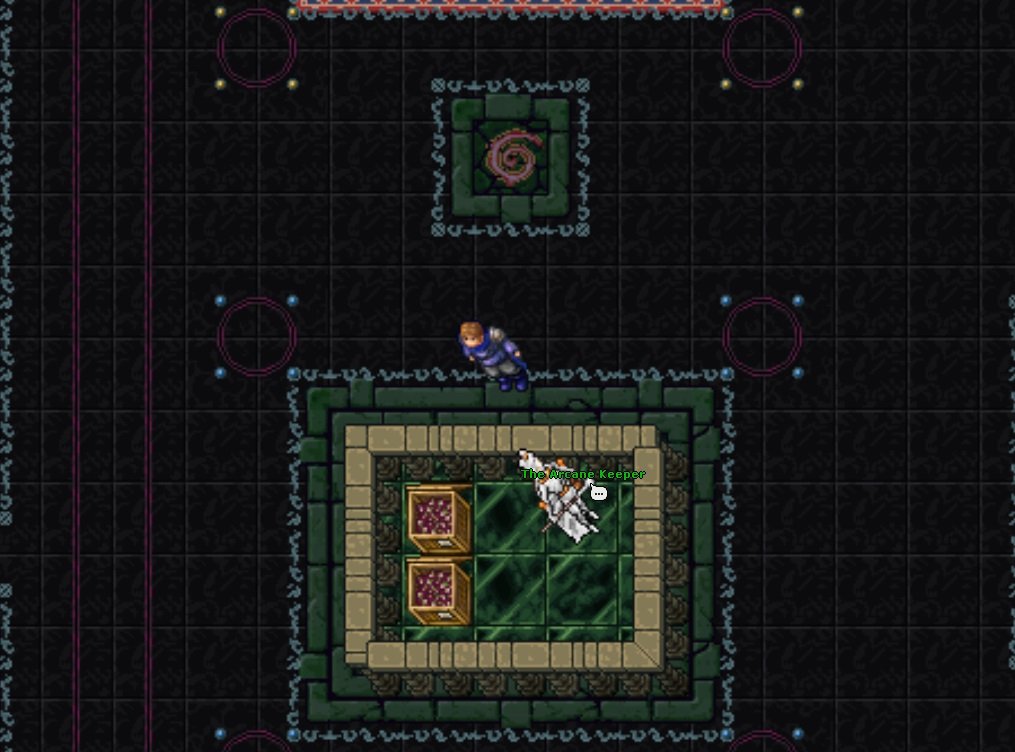
The Arcane Keeper
The Arcane Keeper offers a longer mission chain for PvE players.
- Total missions: 11.
- Types: hunting targets and item collection.
- Rewards: experience, +1 mastery point per mission, and a reward bag of progression items (crystal coins, bone tokens, gold & silver tokens, tier crystals, XP boosts, prey cards and more).
- Capstone: finishing all 11 missions befriends the Mystic companion – summon it from your companion panel (Ctrl+J).
The Darkness Keeper (Forbidden Kingdom)
The Darkness Keeper is an endgame mission NPC inside the Forbidden Kingdom. Available only from level 2250 in that area.
- Access: level 2250+ in Forbidden Kingdom.
- Total missions: up to 18 high-level missions.
- Types: big kill tasks, high-amount gathering, location steps.
- Rewards: high experience and endgame upgrade items.

More Custom Systems
Exploration Skill
Mining (Vein Cracker)
Your Mining level (0–100, shown in the client Skills window) gates the node tiers: Blue from level 0, Red at 20, Green at 45 and Black at 70. Mined nodes deplete and regrow on a timer. Requires the OTUniverse client.
Gear Refinement
Evolution Doors
Machine Shop
Reward Shop
Daily Login Rewards
Playtime Presents
Discord Weekly Reward
Player Market
Your item keeps everything when you sell it. A listed item carries all of its attributes and its Tier over to the buyer — Refinement, forged Tier, stat bonuses, charges and any other custom attributes are fully preserved. The only exception is imbuements: they are removed when the item is listed. Everything else stays intact.
Arcade
Auras
Crafting Forge
The headline recipes are the Grand Sanguine weapons (Grand Sanguine Blade, Cudgel, Bow, Coil, Rod, Claws and more) and, one tier above them, the level-1000 Crypt weapons (Crypt Bile, Jaw, Spine, Slicer, Splitter, Breaker and Strike) forged from rare materials dropped by end-game bosses. There are also the per-vocation Enchanted and Legendary +10% XP rings (Arcanomancer Sigil, Arboreal Ring, Alicorn Ring, Spiritthorn Ring, Ethereal Ring), the eight Great dungeon charms, and a full set of gem necklaces culminating in the Golden Scorpion Pendant. The Crafting Materials tab lets you convert 15 broken refinement shards into one finished shard, and combine 10 normal Tier Upgrade Crystals into a guaranteed Tier Upgrade Crystal 100%.
Two things are worth knowing before you craft. First, Grand Sanguine crafting upgrades your existing weapon: place the base Sanguine weapon in your backpack (never equipped) — it is sacrificed, but the Grand version keeps its full “Bonus:” line and inherits 100% of the base weapon’s tier, so nothing is lost. Second, recipes that call for large amounts of gold (Grand Sanguine weapons need the equivalent of 150 bars of gold, i.e. 150,000,000 gp) can be paid straight from your bank balance — you do not have to carry the bars.
Store-Exclusive Account Unlocks
• Autoloot (1000 coins) — unlocks the !autoloot command so you can auto-collect loot; toggle it with !autoloot on/off.
• Loot Pouch (800 coins) — a 3000-slot bag that always sits in your Store Inbox and can catch auto-looted items without a limit.
• Permanent Prey Slot and Permanent Hunting Task Slot (600 each) — a third slot for each system, up to 3 owned.
• Charm Expansion (450) — assign unlimited unlocked charms and get a 25% discount on charm removal.
• Stamina Refiller (250) — fully restores stamina, usable once every 72h.
• Skull & Frag Removal (500) — clears a red/black skull, 7-day cooldown, protection-zone only.
• Water of Redemption (60/1 or 150/3) — recovers 50% of last-death experience (70% for VIP); also sold by NPCs Crystal Trader and Pirate Sam.
• Random Token (40 for 5) — a mystery box that usually gives crystal coins, bone tokens or exercise weapons, with a rare shot at treasure.
• XP Boost (from 60) — +50% hunting experience for 1 hour of hunt time, up to 5 buys between server saves with a rising price.
Pay-to-Stay Training Area
About the Server
Server Information
Website: https://otuniverse.com
Discord: https://discord.gg/Jg52esP52w
Time Zone: CET (daily bosses Monday To Friday at 20:20 CET)
Client: OTClient (with this server’s custom content)
Gameplay Type: Highly customized OT with pet system, forge, evolutions, daily/auto events, dungeon system, tasks & Mastery Paths.
Rules: Cave bot / unattended macro is not allowed.
Note: This server uses custom progression (tier crystals, mini-boss points, daily necklaces, random events) not found on regular Tibia.
Useful Commands
Basics
- !info / !commands – show server info / list all commands
- !online – show online players
- !time – check game time
- !events – open the Event Hub (active & upcoming events)
- !pl / !en – switch interface language (Polish / English)
Mastery, Companions & Tasks
- Mastery Paths – press Ctrl+U (or the main-panel button) to spend mastery points. The old Stats window and !stats command no longer exist.
- Companions – summon and upgrade your pet (Mender, Guardian, Hunter, Sage, Mystic) from the Companion panel (Ctrl+J); there is no player chat command for pets.
- !task easy,rotworm / !tasks – start or check hunting tasks
- exiva moe fera "Boss Name" – locate a mini boss
- exiva moe res "Monster" – locate a fiendish / influenced monster
Autoloot & QoL
- !autoloot / !al – free autoloot system
- !fullautoloot / !fal – premium autoloot toggle
- !spells – list your available spells
- !mount – open the mount menu
- !outfits / !outfit – view / activate outfit bonuses
Economy & Housing
- !balance, !deposit, !withdraw, !transfer (the old !bank command was replaced by the in-game Bank window)
- !buyhouse, !sellhouse, !leavehouse
VIP / Extras
- !vip – check VIP days/info
- !stamina – refill stamina (VIP)
- !addon – use Addon Doll reward
- !aol – buy Amulet of Loss
- !bless – buy all blessings
What Makes This OT Custom
This OT is built around a long-term, interconnected progression loop rather than a simple high-rate server.
- Deep Progression Loop: Tiered equipment, Upgrade Shards, Mini Boss Points, Forge tiers, daily necklaces/pendants and Evolution tiers all interact, so almost every hunt moves you toward stronger gear or new permanent power.
- Account-Like Growth: Systems such as Mastery Paths, Evolutions, Refinement, Exploration, Prey & Charms and the Token Outfit bonuses give permanent, character-defining upgrades instead of just temporary boosts.
- Unique Gear Effects: Momentum (helmet cooldown cuts), Onslaught (Fatal Hits), Ruse (armor dodge), Penetration (boots damage) and Transcendence / Avatar transform on legs create builds that do not exist on standard Tibia servers.
- Living World Events: Random global events (Boss Frenzy, Storm Invasion, Dungeon Double EXP) and the Server Bonus Basin let the whole community influence respawn, loot, exp and skill rates for a limited time.
- Custom Ring & Accessory Design: Evolving vocation rings with +10% experience and Legendary versions, daily-craftable necklaces and pendants, and rare endgame accessories reward active players instead of pure donation items.
- Companion Pets: Five support companions (Mender, Guardian, Hunter, Sage, Mystic) that heal and buff you and evolve as you gain Evolutions – part of your build, not just cosmetic summons.
- Meaningful PvE Scaling: Random scaled monsters, dungeon instances and high-tier quest areas keep hunting interesting and reward risky pulls with better loot and shard chances.
- QoL Without Pay-to-Win: Free autoloot, clear commands, detailed wiki and multiple token/exchange systems are designed so you can progress by playing, not only by donating.
- Anti-Bot Philosophy: Cave botting and unattended macros are not allowed; the server is tuned around active gameplay, manual hunting and real decision making.
All of this is layered on top of familiar Tibia gameplay, but with enough custom systems that Otuniverse is clearly not a plain 1:1 Tibia server – it is its own evolving world.